Sunday, January 25, 2015

Seaside Saison Brewday


Somehow (I don't remember when/how) the idea was planted in my head that the water at Sante Adairius Rustic Ales had elevated levels of sodium and chloride, possibly because they are using well water and are pretty close to the ocean. Since hearing that I feel like I can taste a bit of that saltyness in their beers. Though recently I have looked back to substantiate this long-held idea of mine, I have not been able to find a source to clearly confirm (or invalidate) that information. Whatever the case, drinking some of the fantastic saison-oriented beers from Sante Adairius and perceiving a mild saltyness, the the idea was planted to brew a saison with elevated sodium chloride.

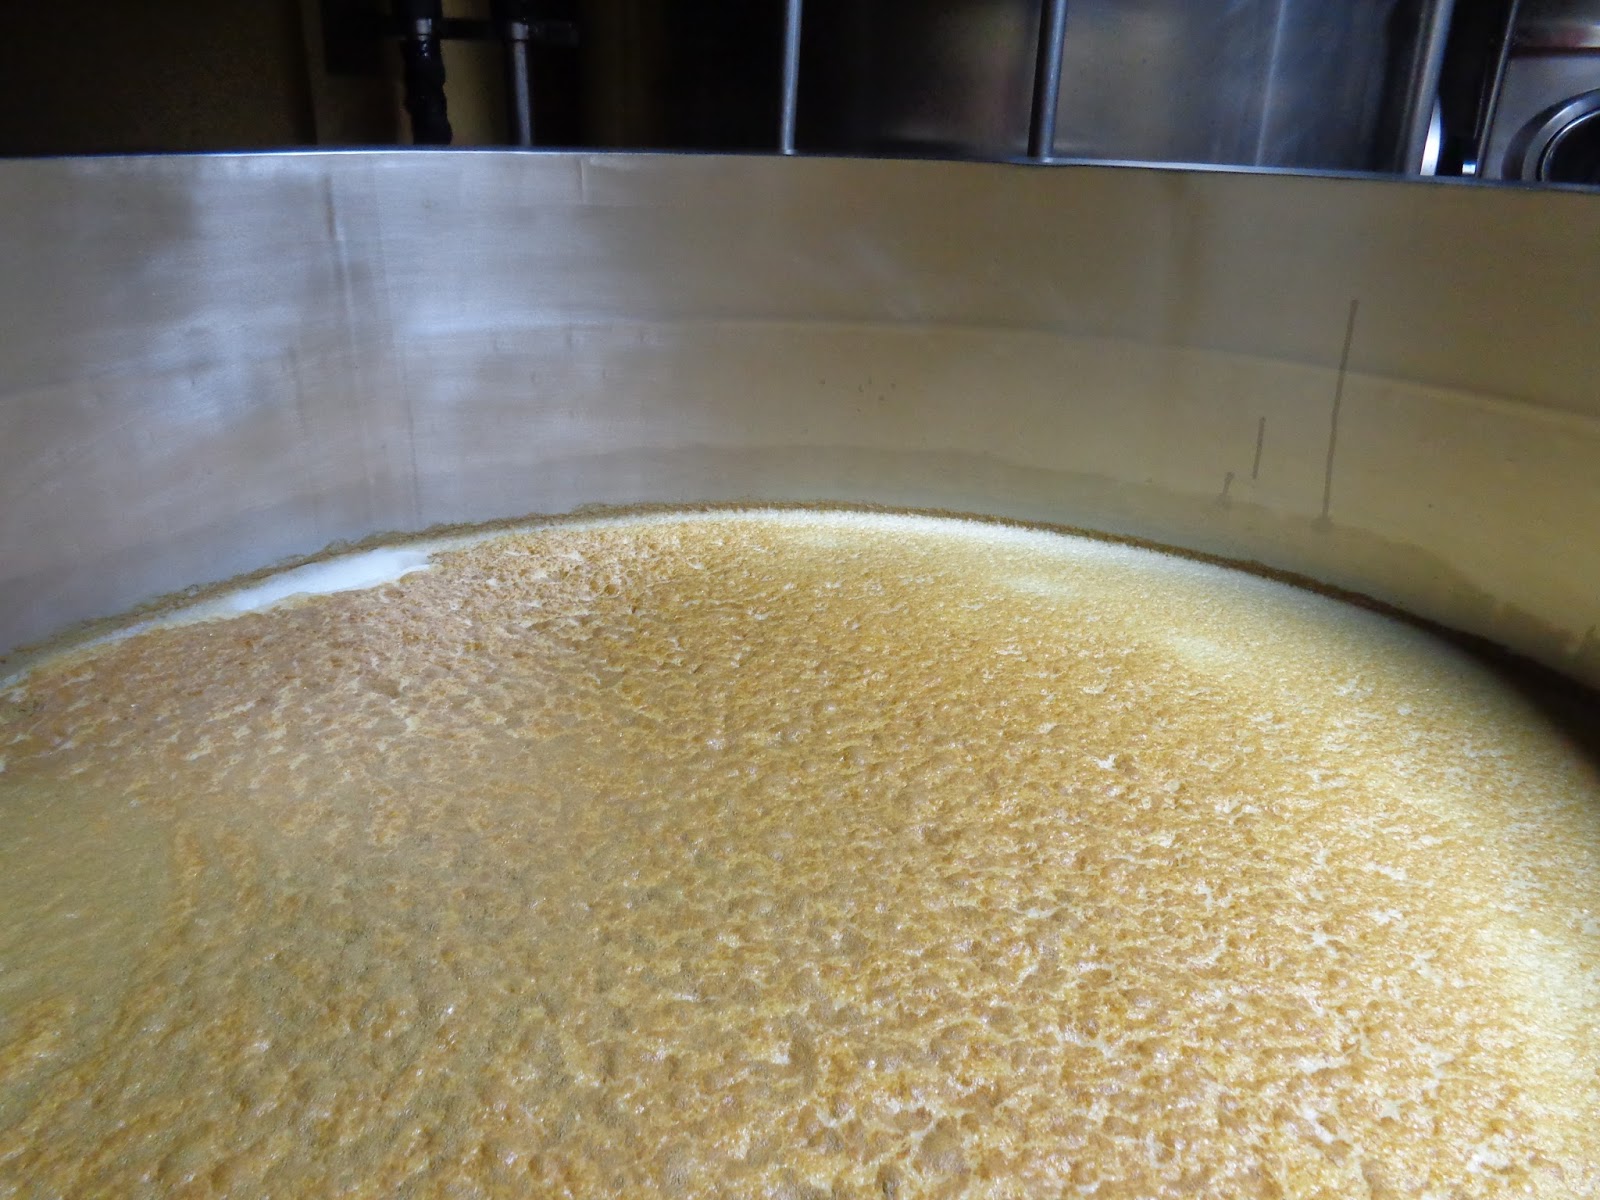
Mashing under my rainy day tarp.
If you aren't familiar with Sante Adairius (SARA for short) they are a small brewery in Capitola, near Santa Cruz Ca. They produce some of the best saisons I've had (along with some really solid hoppy beers) and I really like the outlook that the brewer Tim has. I've never met him, but he shares some of his ideas in his interview on the Brewing Network's Sour Hour. In the interview he also talks about his saison yeasts (he is using a blend of Belgian and French saison yeasts) and he mentions that his water as a high mineral content, and even uses the term 'salty' to describe it (but never specifically mentions sodium or chloride and mentions that pre-boiling the water helps some of these mineral problems suggesting that temporary hardness may be an issue). 
So whether or not SARA actually has elevated sodium chloride, the idea was born and I wanted to try brewing a saison with higher sodium levels. Generally sodium is advised against in brewing and suggested maximum levels are around 75 ppm or below, but up to 150 ppm could be okay. However some styles can make use of higher sodium (such as Gose, a tart German style from the Leipzig area with additions of coriander and salt). Shortly after I put this beer in my brewing schedule I learned from my friend and local maltster Mike Doehnel that he was going to malt some barley that was grown next to the beach at Island View rd. in Saanich (I talked a bit more about Doehnel malts in this post). This seaside-grown barley fit perfectly with the beer I had in mind.


Preparing the tasting
In order to determine how much salt to use for this I did a bit of searching around for what others had done in Gose homebrews. From these values (in g/gallon) I came up with a range of what I wanted to try in ppm from a bit below Gose levels to a bit above. I weighed out the ranges table salt into 50 mL vials and dissolved the salt in 10 mL of water. From these salt solutions I prepared a tasting with 6*10 cl pours from one 750 ml bottle of a previous saison. Each was spiked with 1.1 mL (5 with the concentrated salt solutions and one with 1.1 mL of water as a blank). The final levels in each of the glasses are shown in the table below. Because neither sodium nor chloride are important in hitting pH levels (unlike calcium and the carbonate system), spiking the finished beer in the glass probably comes closer approximating the effect of Na and Cl in the brewing water throughout the process.

salt spiking table
On first tasting I noticed the actual salt in glasses 3-5 (they tasted salty), but in all the glasses I was able to see an overall difference in the beers (from mouthfeel and flavor changes that aren't as identifiable salty-oriented). At first sip nothing was too salty to drink. There was a significant difference between what seemed like an appropriate level at first and what I decided in the end. This may be partially due to the beers warming but I think it might have more to do with the differences between the right level for a few sips and the right level for a small glass. With this reasoning I extrapolated from what I liked in the 10 cl pours to what I would want for a batch (especially knowing that I can always add more salt but removing it isn't an option unless I blend in another beer).

The 5 salt spiked samples and the blank.
As the beers warmed I could taste the salt (saltyness in addition to the other changes mentioned above) in all of them. By the end glasses 4 and 5 were far too salty and I didn't want to finish them. Glass 3 was too salty for this beer but drinkable and maybe more in line with what I might want for something more salt-forward like a Gose. The switch from pleasantly salty to too salty for this beer (when tasting small amounts from the glasses) happened between glasses 2 and 3. For one small 10 cl glass, glass 2 was possibly about the right amount. But glass 1 was rather pleasant and probably better for drinking larger volumes. There was still a touch of saltyness, at least when I was looking for it, but the impact was more on the mouthfeel and the overall flavor than the flavor of saltyness. I decided to go for a bit less than what was in glass 1 for this batch based on the reasoning above and because I'm not looking to create a salty saison (by that I mean a saison tat tastes salty) but rather a more subtle beer with the influence of elevated sodium.

Recipe
Brew Date: 18-January-2015
Target carboy volume: 7.5 gals (28.4l)
OG:1.045
IBU: ~29 (Tinseth)
Color: ~3 SRM
Target FG: ~1.001
Expected ABV: 5.7%

Grist:
The grist.
82.4% Doehnel #30 (Pils oriented malt would work as a substitute) - note that this malt has a lower level of moisture than the average malt so my extraction was a couple points higher than the average pils malt. The percentages of grains in Beersmith are by weight, not extract, so increasing the pils portion if a normal pils is used would closer match this grist.
8.8% Flaked spelt
5.0% Flaked triticale (I would have omitted this if I had more spelt around)
3.9% acidulated malt (Weyermann)

Hops:
31.6 g Sterling pellets 11.1% aa (Hops Direct 2014 harvest)
28 g Saphir pellets 2.8% aa (Hop Union 2013 harvest)

Yeast:
A blend of Wyeast 3724 (Belgian saison), Yeast Bay Wallonian Farmhouse, Wyeast 3726 (Farmhouse ale), and Wyeast 3711 (French saison) (in that order) for the main fermentation. Having been pleased with previous blends using 3724, WF and 3711 I decided to see how 3726 added to the mix. I suspect it will compliment the more fruit-forward 3724 and WF

As I have regularly been doing for recent saisons, I brewed enough to fill a carboy for a mixed yeast and bacteria fermentation and longer term aging. To that carboy I pitched some dregs from sour saison oriented beers that I enjoy as well as some brett strains that have a good mix of fruityness in addition to milder funk and a Lactobacillus strain. This carboy received Yeast Bay amalgamation Brett blend, ECY04 Brett anomala, Crooked Stave brett (from the 30 gallon oak barrel I share with two friends), Upright flora dregs and Wyeast 5223 Lacto brevis.

Other:
10.0 g CaSO4 - +77 ppm Ca2+, +184 ppm SO42- in 7.5 gal strike water
6.5 g CaSO4 - +67 ppm Ca2+, +161 ppm SO42- in 5.5 gal sparge water
I decided not to add any CaCl2 due o the high levels of Cl- I was adding from the sea salt
9.0 g sea salt +117 ppm Na+, +183 ppm Cl- in 30 l (approximately my target final volume) added to the boil
1 tab whirlfloc
3.3g Wyeast yeast nutrients
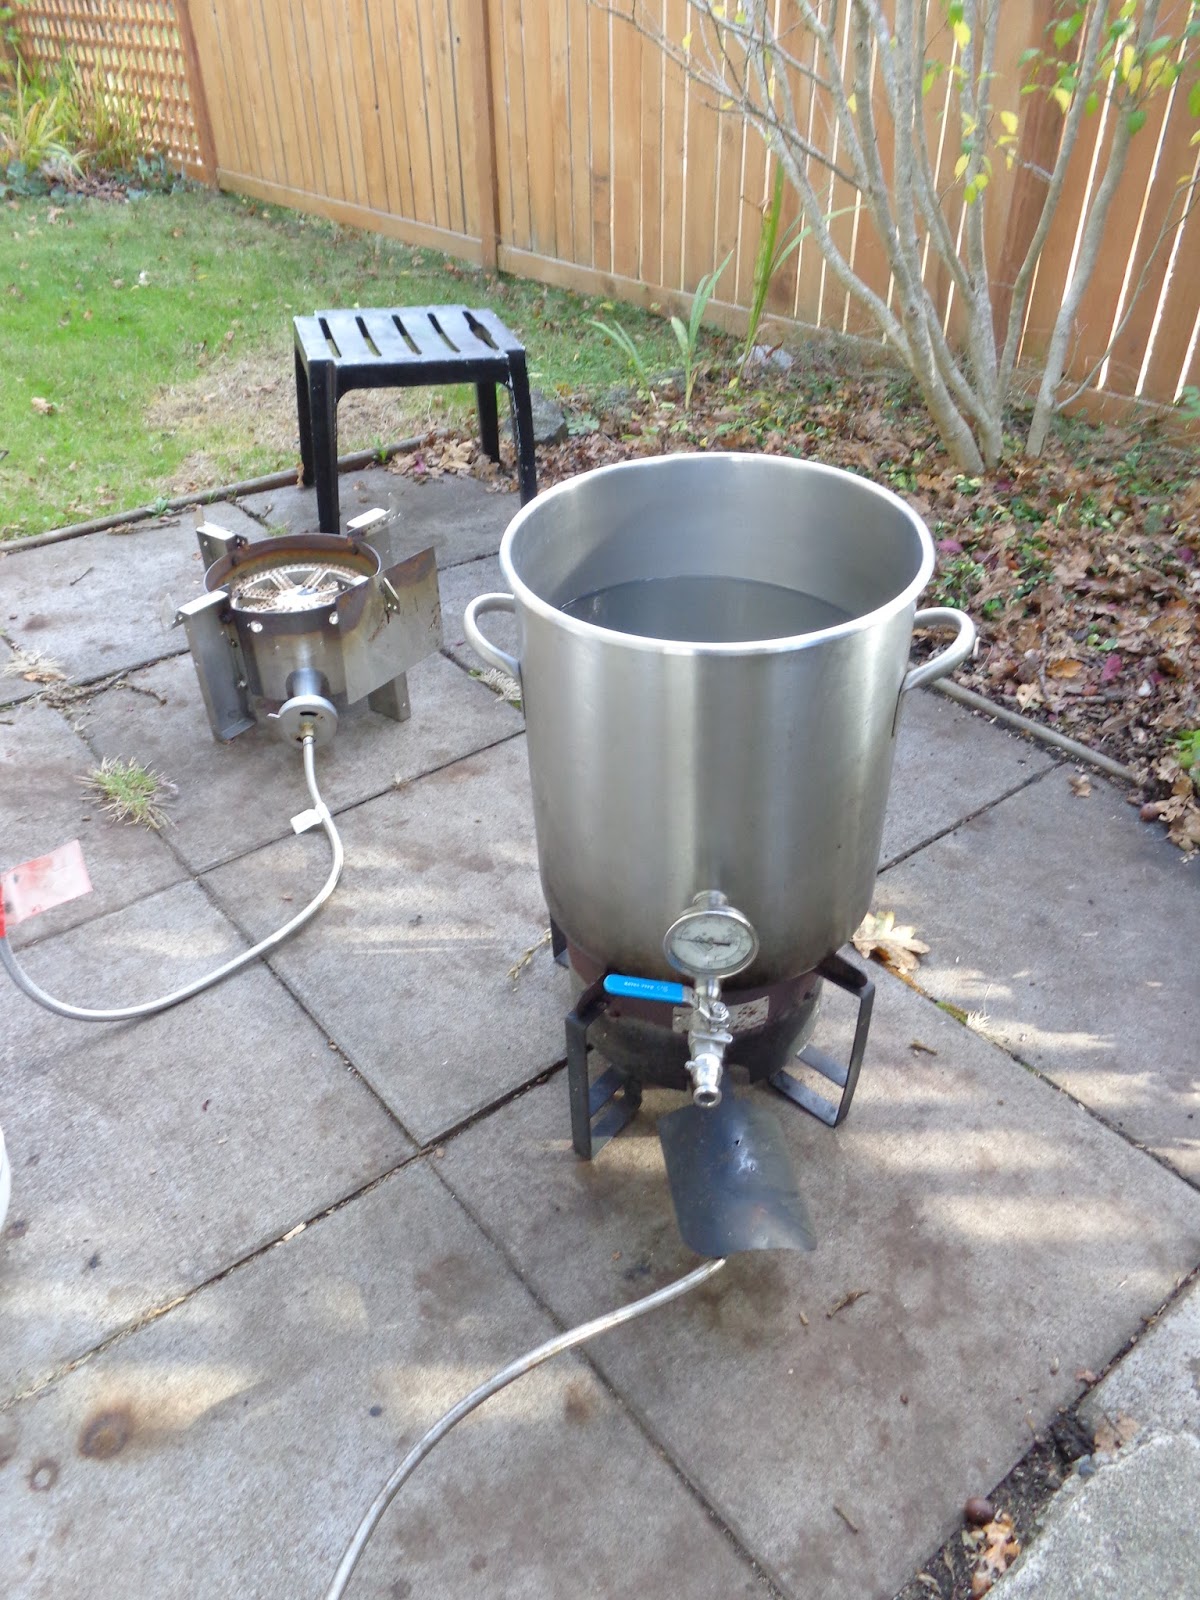

Mash:
I used my typical 2 step saison mash profile of 146 F (63.3 C) for 50 minutes and 154 F (66.7 C) for 20. I didn't mash out above 158 F (70 C) to prevent denaturing the enzymes and allow conversion throughout sparging and into the kettle.

Boil:
I did a 90 minute boil expecting 1 gallon per hour of boil off and 1.25 gallons of trub loss. I pulled about 2 l of wort before adding hops to activate/wake up the 3724 I had in the fridge. I am doing a couple trials to see if it helps this finicky yeast to go into a fermentation active rather than dormant. The Sterling was added with 40 minutes left in the boil and the Saphir was added at flame out. I did a 25 minute hot steep/whirlpool.

Fermentation:
I pitched at ~68 F (20 C) and raised it to 78 F (25.6 C) over the first 3 days, where it is sitting now.

The final wort was pleasantly different from previous saisons I've made with a similar recipe. I couldn't really pick out salt, but I imagine that had something to do with it. I'll fill in updates as this beer progresses.

Here are tasting notes for the Seaside Saison.

Friday, January 9, 2015

New Year's Plans and 2014 Reflection

A bit of non-beer time in northern Italy
For the past couple months I've noticed that I have often been independently on the same page for brewing with Amos at Browne and Bitter (hop-forward saisons, spontaneous fermentation, sour soleras...). But I can claim no such thing with this post. I shamelessly got this idea from reading his recent plans for 2015 post (an idea he says he got from other blogs). Although perhaps there won't be too much in the way of technical brewing info or recipes in this post, I'll benefit from laying these ideas out (and thinking them through a bit more as making such a list entails) and hopefully you'll benefit from either being prompted to make a similar list of your own or from seeing my process for why I am focusing on what I am focusing on.

One of my favorites from 2013-14: Geuzestekerij De Cam
I'll start with a quick breakdown of what stands out to me as I look back on my last year of brewing. I spent about 9 months away from brewing due to a move to Mainz, Germany from the start of October 2013 until the end of May 2014. While this provided plenty of great opportunities to visit breweries, try beers, and speak with brewers in Europe (mostly Belgium) as well as time to do a bit of traveling not related to beer, by the time I returned I was really ready to get back to brewing. Spending that long not brewing but thinking and reading about the beers I wanted to brew and planning out some recipes, combined with wanting to make up for lost time, had a big impact on the brewing that I did in 2014.


Year in review


One boil split into 4 different petite saisons.
1) Directed, planned and repeated brewing - I did this sort of thing before 2014, but planning and specific goals directed my brewing this year much more than before. Most of the beers I brewed in 2014 were in a pretty similar range, and I repeated multiple recipes with minor changes while the memory of the earlier batch was still fresh in my mind and while some bottles were still around. In addition to these replicates with different hot sides and slightly different recipes, I split a lot of batches for different treatments in the carboy (or at bottling). This regular and repeated brewing let me directly test certain aspects of my process while eliminating almost all of the other variables, which let me improve what I'm doing with a bit more confidence that the results weren't due to something other than what I intended to change.

When I wasn't brewing a variation of a recipe (and even when I was) I spent more time planning the brew day and what processes I was going to use. Full disclosure - I spend a lot of time planning and taking notes. Some of my friends give me a good-natured hard time because of it. And I know that some people don't enjoy those parts of brewing and would rather brew a bit more spontaneously. That doesn't work as well for me but if that's what you find enjoyable about the hobby and you are happy with that, then I think you are fine to keep with it. Anyway, this planning helped things run smoother on brew day, but more importantly the brews were easier to learn from since I knew and thought about what I was going to do before I did it. Therefore I was able to test out more stuff, and when not directly testing something I still had a good record of what I did and what my reasoning was for doing it.

Racking from the open primary into barrels and secondary.
2) First commercial brew - In October a local brewery Moon Under Water asked me to collaborate with them on a saison. This was a big milestone for me as a brewer and an awesome experience. The brewers Clay and Jeff were great to work with. I've continued to work with them on barrel aging projects and general brewery operations, which has helped me to do more with barrel aging and souring than I could as a homebrewer and helped me learn about the day to day operations of a brewer. Like many homebrewers I have had thoughts of commercial brewing. I'm not sure if it is right for me and if it would take some of the fun out of brewing, but starting to work with commercial brewers and learning more about commercial brewing definitely helps me know what I would be in for if I were to go that route. And if not it is a pretty fun experience for expanding my homebrewing and getting to sit down in a bar with friends and drink the beer.

3) Connecting with others thinking about similar things -Starting up this blog has connected me with other brewers outside of my local homebrewing community. There are plenty of great brewers locally and I definitely learn from the things that they are doing, but discussions with others in different areas thinking about the same sorts of questions and brewing the same sorts of beers as me has helped me learn more about brewing the styles I am interested in (from both the discussions and the research I do to help feed the discussions) and has given me some new ideas. This is something that has happened much more than I expected it would.

4) Milk the Funk - In the later part of 2014 I started contributing to the Wiki for Milk the Funk, a new facebook group, forum and wiki for info about brewing sour and funky beers. I'll admit that I'm not a huge fan of the name, but perhaps there is a good story about why they chose it that will make me like it (I felt the same way about The Rare Barrel until I heard their story). Anyway, that doesn't change the fact that it is a great resource for and community of brewers who love brewing the sour and funky beers. If that's the sort of thing you are interested in and haven't checked it out yet, you should. I'm happy to be contributing to the wiki to help bring together one site for info about brewing these types of beers and resources for learning more. It's a work in progress (as wikis will forever be) but some great stuff has been put up in a relatively short amount of time so far.

Plans for 2015

1) Work on blending - The 'magic' of many of the beers I am most inspired by comes in how the beer develops in the barrel and how the brewer/blender uses the unique character of each to create a final product or final products that they are looking for. There are a few non-blended sour beers that I've had that I thought were really excellent, but the vast majority are blended. I've done a small amount of blending so far, but this has mostly been at bottling or in the glass with different homebrews

By 2016 my barrel capacity won't be this awesome, but there is room to dream. At 3F.
This sort of thing requires sufficient time input to have enough aged beers around for the blending, and I now have enough aging beer around that I think I can get more into blending. And using the characteristics of some to add a missing element to others. To further this I have brewed an acid blending beer (basically a rather acidic beer that I can use to adjust the acidity of others) that I plan to keep around and top up as needed with fresh wort. And I also have a brett blending beer around, and will likely brew a second in the coming months. I'll use these more acidic or brett-forward beers to guide a series of soured saisons, which may also be blended together, to what I am looking for in aged and somewhat but not sharply acidic saisons.

I expect a long learning curve for this. I imagine I'll try a couple of processes for the blending before I come up with the best one. And I would like to practice on shorter time scale brews like saisons before venturing into lambic-oriented blending of long-term complex mixed-microbe fermentation brews. I may also extend this blending to some clean beers, but for now the focus will be on soured saisons. It will be almost all carboy sours at this point as well, but hopefully I can put the two oak barrels that I share with friends to use with blending (and also hopefully expand my barrel aging).

2) Continue targeted brewing with style focuses - I think many of the advances I have made this year in brewing are due to pretty directed brewing. I'd like to continue with the yeast blending work I've been doing and solidify some blend selections. I also plan to work toward a blend of different bretts that I am happy with. I like some of the brett stuff I've done so far but I haven't found the right combination to get what I am looking for. So I'll probably transition a bit more toward working on adding single strains and blends to saisons to find the brett blend I'm looking for.

If I decide to step away from brewing funky and saison-oriented beers I'd like to do some focused work on hoppy pale ales. Over the last year I have been shifting toward lower abv more drinkable beers. I generally like having larger volumes of good low ABV beers (that are still flavorful) than A DIPA/barleywine/imperial whatever. Not that I don't also like those in moderation, but that's the way my brewing and beer consumption has been shifting. I like drinking beer, what can I say... So anyway, the goal with the hoppy pale ales is to try different processes for trying to get the hop character in some of my favorite commercial hoppy beers. I've brewed some alright IPAs before and I've been happy with them, but some breweries just really stand out in excellent hop use (and it's not always more is better) and I want to work on that. We'll see if I can be torn away from saisons and funky/sour beers long enough to work on this.

Saturday, December 27, 2014

Soma at Moon Under Water Brewpub


It is probably the dream of most homebrewers to get to brew a big batch of one of their beers on a commercial system. In October Moon Under Water, one of the local Victoria breweries, asked me to do just that - brew a 10 HL (8.5 barrel) batch of my favorite recipe: Soma, my saison. I was honored to get this offer and both excited and nervous to try it out. This is a recipe I've worked pretty hard on over the last two years. Working on the yeast blending for saisons (post 1 and post 2), tuning the mild acidity levels from pre-primary souring, and in general trying to work out the hop balance. I feel like I have it somewhat close to where I want it on a homebrew level (although the recipe is always evolving) but trying to scale up the recipe definitely presented new challenges. This write up details the brew process, what I learned from scaling up my recipe and brewing it on commercial equipment, and what I would like to do differently next time.

Just hitting a boil.
I have to say from the start here that Clay and Jeff at Moon Under Water were great to work with. They were open to whatever I wanted and gave me complete control over the recipe and process we'd take. And any decisions heading into the brew day regarding making this beer that deviated from my homebrew recipe were my own and were made considering the different equipment, process, and risks involved in a commercial batch. With some of the batches leading up to this brew I had been pushing the acidity of the beer. With some of these brews possibly slightly too acidic, or at least a bit out of balance, I backed down on the target acidity a bit. I also backed down on the hopping load. This was due to both my expectations of increased utilization on a commercial system and my experiences with some rough hop character recently in some homebrew batches (earlier batch of Belgian single and Sour-Worted Soma).

There are definitely some challenges when scaling a recipe up to a commercial size, as commercial brewers and any homebrewers that have done this or looked into it know. I'm really happy with how our hot side went, and I don't think we ran into much trouble there, but the fermentation definitely presented some challenges. These snags sort of acted together as one, with one feeding into the other.

We went with the yeast blend that I normally use, and I think this is really important in producing the character of the beer. I had never grown up the sort of yeast we were going to need for this batch, so I dropped off a pack of each of yeast for the brewers to grow. Generally they either use dry yeast or talk to local brewers for a pitch (the breweries here seem to cooperate well and share yeast/knowledge/etc. freely with each other) when they want to use a new yeast. So it turned out that we both didn't have a ton of experience growing up yeast from packs to ~1000 L pitches. So we didn't quite grow enough yeast and the first challenge we faced is that we pitched at a lower rate than I generally do. This lower pitch rate, and the subsequent slow start to fermentation, fed into the second and main challenge we faced.

Filling the open fermenter.
We fermented this beer in an open fermenter in Moon's 8-vessel fermentation room. As a side note, adding the yeast was a bit of an adventure. We had the yeast in carboys and we added it by swirling up the carboys and carefully pouring it in over the top of the open fermenter. The top of the open fermenter is about at my chin, which made pouring full carboys a bit tricky.

Many of the other fermenters of the fermentation room were sitting at cold-crashing temps, and because the room is rather small and can be isolated from the rest of the brewery by a set of double doors, the fermentation room  was rather cold. Because we used an open fermenter our fermenting beer was not as insulated from this cold room as a normal cylidroconical would have been. So although we didn't have the glycol jackets on, the cold room definitely had an influence on the beer.

We were working with a notoriously tricky yeast (Wyeast 3724, Belgian saison) which is especially temperature sensitive. Starting with a low pitch rate meant that we got off to a slower start and didn't generate heat from fermentation as quickly. This insufficient generation of heat then fed back into lower beer temperature and lower yeast activity, which cycled back into continued insufficient generation of heat. So because out pitch rate was low, the fermenter was sitting in a cold room, and we had no way to warm our fermenting beer (although I knew this was going to differ from my home brew process going in the big batch, the impact of this limitation was greater than I expected it to be) our fermentation never got warm enough. And this significantly suppressed the 3724 character and left more work for the small helper pitch of 3711 to take care of.

The fermenting wort.
This was evident from early on in the fermentation, and it left it's mark on the final beer. So now the point has been driven home that if I use 3724 on a commercial system, I will need to set things up better to keep a fermentation warm, and possibly come up with a way to add a bit of extra heat. I do have the ability (sort of) to see how this batch would have been had the fermentation gone according to plan. We filled one 6 gallon (23 L) carboy which we temp controlled the way I normally would to compare how the commercial sized fermentation (temperature, hydrostatic pressure, etc.) changed the beer. Although I haven't done a side by side tasting yet (the beer from the carboy is still bottle conditioning), at bottling I did prefer the carboy version to the open fermenter beer.

Racking into the barrels.
After 4 days in the open fermenter we transferred the beer to a 10 HL horizontal tank and 2*225L wine barrels. The jackets were turned off on the horizontal tank and the beer was allowed to rise as far as it would (which wasn't much due to the sluggish fermentation) until it reached terminal gravity. The gravity was still pretty high after about 2 weeks (it was at about 1.015) so we decided to prepare a pitch of S. trios (White Labs WLP644 Brett trois was recently determined to be a Saccharomyces yeast rather than a Brettanomyces strain, and I will refer to it as S. trois from now on). We decided to give the beer a couple more days to see if it would finish up on it's own, but after about 2.5 weeks the beer was only down to 1.010 and I was tasting something that I often, but not always, get out of the French saison yeast (Wyeast 3711) that I would prefer to not have. It is sort of a green and yeasty character, a friend of mine recently described it as being a bit like green bananas. So we added the S. trois and gave it a couple more weeks to finish up and clear.

The two wine barrels came from Averill Creek and formerly held red wine followed by blackberry port. This was their first use for beer, but they had been filled with water at the Moon. The barrels were inoculated with a base of Yeast Bay Amalgamation blend (thanks to Jeffery for giving me a good pitch of this) and Wyeast 5223 Lactobacillus brevis. In addition one of the barrels has some ECY02 Flemish ale blend from East Coast Yeast, an excellent source for unique yeasts and funky blends, and the other barrel had an addition of S. trois. They are aging nicely and I am really excited for how they turn out. At this point the ECY barrel stands out a bit with some mild but developing funk but both barrels have a nice complex fruityness from the saison yeasts and Amalgamation blend. The acidity is starting to show up and they can age a while longer without being in danger of pulling too much oak/barrel flavor. We'll see how they change over the next month and maybe there will be some additional cultures added if needed, but I am definitely happy with how they are now. I expect that they will be blended together at bottling.

I marked the barrels with some inspiration from Brussels
Recipe
Brew date: 20-October-2014
Batch size: ~1100 L (9.4 bbl)
OG: 1.049
FG: 1.003 (1.000 on the 23 L carboy)
ABV:
Target IBU: ~25 (some guesswork here as I don't know the utilization of the big system and the process changes that go along with it).

Grist:
87 % Best pilsner malt
7.5 % Best Vienna Malt
5.5 % Weyermann Acidulated Malt

Hops:
Saaz: 800g with 30 minutes left in the boil and 1430 g grams added at whirlpool
Hallertau: 1100g with 30 minutes left in the boil and 1430 g added at whirlpool
Yeast:
Wyeast 3724 Belgian Saison, ~80% of the total yeast pitch
Wyeast 3711 French Saison, ~20% of the total yeast pitch
WLP 644 S trois added to the clean portion after ~2.5 weeks.

Both barrels were inoculated with Wyeast 5223 Lactobacillus brevis and Yeast Bay Amalgamation blend. One barrel also got a bit of ECY02 Flemish red blend and the other got S. trois.

Other:
Breakbright was added following what they normally do (I don't know the exact amounts).
CaSO4 and CaCl2 were added to boost Ca 92 ppm, SO4 167 ppm and Cl- 39 ppm in 10 HL. Victoria's water is pretty low in everything so these are reasonably close to the final concentrations.

In addition to the saison in barrels I have started helping out the brewers at the Moon with another barrel project. And in addition to these two barrel aged projects there will likely be some more clean and funky beers to come out of collaborations with the brewers at the Moon. I'll keep the blog and facebook page updated with these projects.

Wednesday, December 10, 2014

60 gallon barrel and saison brew day

The grooves on the insides of the staves
Getting caught up on posts of past brews seems to be a never-ending battle. This is a bit of a long post, which is fitting for a long brew day and the long aging to come on this beer. Hopefully you find the run down of our process (both brew day process and thought process leading up to it) helpful if you are planning a big brew to fill a barrel. I'm definitely a proponent of planning brews well, especially when doing something well beyond what I normally do (or have done before) like this. And if you aren't thinking of that sort of thing, hopefully the challenges of brewing such a quantity of beer on normal homebrew systems makes for an entertaining read.

Preamble

Through the work of my friend Jeffery I've recently started aging beers in a second used wine barrel. The first barrel is a 30 gallon Hungarian oak barrel that previously held red wine at a U-brew shop for a year or two before we acquired it (and in comparison to this new barrel, it looks amazingly small). This new barrel is grooved American oak and held wine at Glenterra Vineyards for about 10 years, so the oak character ought to be pretty neutral. Glenterra uses wild fermentation for their wines so we might find some interesting microbes already in the barrel. And either way it ideologically fits well with the sorts of mixed microbe fermentation we are looking for from this barrel. Generally John at Glenterra keeps his barrels around when they are neutral (he isn't looking for lots of newer oak barrel flavor, which I appreciate) so we were a bit lucky to get this barrel. The one catch, and the reason we got it, was that two of the staves were cracked on the outside at the top of the barrel so John didn't want to continue using the barrel. But since the barrel was free we were happy to give it a shot.

The empty barrel with a wax-sealed crack
If you read anything or talk to anyone about barrel selection, cracked barrels are an immediate pass. But that is assuming that you are selecting from a number of barrels and you can find one for the same cost that isn't cracked. When, on the other hand, your options are one free barrel with a couple cracked staves or no barrel, the conditions are a bit different. We figured that if it passed water tests then it should be alright, and if the first batch of beer through tells us otherwise then it wasn't a huge loss. And we could feel the inside of the barrel where the crack was to confirm that the inside wasn't cracked, so it seemed to be an issue constrained to the surface (had the inside also been cracked we would obviously not have used the barrel). The two staves adjacent to the stave with the bung hole are cracked, but the bung hole stave is fine (that likely would have been another deal breaker). To be extra careful we sealed the top of the cracked section with wax, following some of the barrel waxing ideas presented by Funk Factory and Embrace the Funk.


Look how much brew gear we fit in here!
We had three people on board at the start of this barrel: Kyle (who is housing this and the first barrel), Jeffery (who found this barrel through his common interest in what John is doing at Glenterra) and myself (I guess in this context I look like a bit of a free loader). With only three of us to start we decided to take a solera approach. If you are unfamiliar with this, the idea is that on every pull from the barrel we only partially empty it rather than fully emptying it. And we will then replace this volume with new beer. The idea of each of us coming up with 20 gallons of wort for fills every time the beer in the barrel was ready was pretty daunting (and 20 gallons of the same barrel beer at every empty was a bit more than we needed as well). Something 5-10 gallons each at each pull from the barrel is a bit more reasonable.

Had to keep 70 gallons worth of yeast safe
Though this approach will help us down the line, that still left the first fill as a bit of a challenge. We figured that with our combined equipment we could, in one giant brew day, come up with enough wort to fill the barrel. And so the plan for a ~70 gallon brew day was born...


The Big Brew

In case you are thinking of doing something like this in the future, I'll lay out our approach. We were going to run 3 consecutive brews with mashing of brews 2 and 3 taking place during the boil of batches 1 and 2 respectively. Going into it we assessed the kettle situation (1x20 gallon, 1x15 gallon, 1x13.5 gallon, 1x10 gallon, 2x9 gallon and 1x7.5 gallon). We had one kettle with a false bottom large enough to comfortably mash enough grain for each batch (the 20 gallon). We then assigned pots to either boiling wort (28 gallons total pre-boil volume, plus boil over space) or heating strike water/sparge water (13 gallons for stike water and 18.8 for sparge). It worked out nicely that we could use a 13.5 gallon kettle, a 10 gallon kettle, and a 9 gallon kettle for the boiling. With each of these pretty close to full we could manage our boil. We didn't worry too much about getting equal gravity in each pot and simply blended runnings by feel while we were collecting to try to equalize things. As the brews went on we got better at this. We did measure gravity and volume on each of the boils, and by this we were able to estimate our OG produced from each batch.


That left us with a 15 gallon, a 9 gallon, and a 7.5 gallon pot. The 15 gallon could do the strike water well and with the help of the 7.5 gallon we were set for the sparge water. That left us with a 9 gallon to spare, which was very helpful when it came to juggling volumes into each of these pots and limiting how often we had to carry large full pots.

Our mash tun and it's blanket insulation.
Likewise we were going to need to be able to heat each of those pots. We had 3 burners and an electric system (for the 13.5 gallon). Two of those burners were needed to drive our other two boil pots, which left one for heating strike water. In sort of a circular way, this also informed pot choices for the boil and strike water. When it came time for the sparge, where we had 2 pots to heat, we would need another burner. But this wasn't really a problem because by the time we were ready for our sparge we needed to be done with the previous boil so that our boil kettles were ready to be filled once again. So we had an extra burner (2 actually) for heating the second volume of sparge water. And since this was our smaller volume it could heat up much quicker.

That covered most of our bases A couple other things we were going to need to worry about were carboy space, yeast, and fermentation temp control. The first part was simple enough to plan. Basically it required 70 gallons of total wort divided by ~5 gallons in each carboy = ~14*6 gallon carboys, plus or minus a carboy or two depending on how full we make each one. It turns out that this required just about all of the empty carboys we collectively had, but we made it work. I suppose I should note that we wanted almost 70 gallons pre-fermentation to allow for us to completely fill a 60 gallon barrel while leaving the trub behind, and maybe giving ourselves a bit extra to top up as needed or compare the barrel aged version to the non-barrel version. We learned the hard way about planning for extra wort when filling a barrel during the first couple fills of our 30 gallon barrel, in which all of the beer prepared either just barely filled or didn't quite fill the barrel. Extra beer is definitely better when going into a barrel filling!

Jeffery, master of gravity systems, prepares our chilling setup.
Preparing yeast for 70 gallons isn't fundamentally different from 5 gallons, just a longer lead time and some large flasks on stir plates. I generally use the Mr Malty yeast calculator, but the brewer's friend calculator has a built in function for stepping up starters, which requires fewer transfers and may be easier depending on your setup. For temp control, we had a fermentation chamber that could fit 3-4 carboys, 2 tubs for hot water baths that could fit two carboys each, 3 aquarium heaters to heat the water baths and a heating pad or two. This obviously didn't quite add up to what we needed. Luckily we were able to utilize an unused bathtub in an extra bathroom. This gave us a hot water bath that could hold 3-4 carboys, getting us much closer to our goal.

Our four tier gravity system for cooling.
So yes, I have now 'brewed beer in a bathtub', as the old stereotype of awful homebrew goes (but it was in carboys too). In the end we only had one carboy left out of a water bath or fermentation chamber, and we were able to control that one with a heating pad and by basically making the entire bathroom a warm fermentation chamber. We knew it was just going to be for a week until we could get them into the barrel so this temporary solution worked fine. If this sort of big brew is something you are planning on doing, where you suddenly need to temp control ~60-70 gallons of beer, perhaps you can get away with a  solution like this and temp control a whole small room in your house for a short time.

I should note that I did miss discussing the step of chilling this much, but based on how we brew the chilling demands weren't substantially different from an average individual brew. I was recently reminded of my first batch of homebrew years ago. I didn't have any friends that brewed and I learned everything I knew at that point (which was almost nothing) from a book or two. The brew day went well enough until the end of the boil, when it suddenly occurred to me and my brew partner that we were going to need to cool down this ~20 L of boiling liquid to room temp. And without contaminating it. And from what I had read at that point I believed it had to be done as quickly as possible. Needless to say it was a bit of a disaster. Well you only make that sort of mistake once. For this big brew this was fortunately not an issue. We all individually had our own chilling capability so we had that well covered. Out of simplicity we ended up running the wort from one of our boil kettles into another to avoid needing 3 chillers, to avoid needing to transfer a plate chiller, and to help prevent the transfer of hop material into our carboys.

Finishing up the brew by firelight
In the end we got 13x 6 gallon carboys, all full a bit past the 5 gallon level. I think that about covers the brew day. On to the recipe.

Recipe
Brew Day: 16 November 2014
Batch size: 23 gallons in carboys
Target OG: 1.050
Target IBU: 20

Grist:
68.1 % Weyermann Pils Malt
20.1 % Flaked Wheat
7.9 % Vienna Malt (Best and Weyermann)
3.9 % Acidulated Malt (Weyermann)

Hops:
295g of a mix of noble type hops at roughly 4% aa targeting ~20 IBU.

The barrel and our 13 carboys of wort
Yeast: Wyeast 3724 Belgian Saison and Wyeast 3726 Farmhouse Ale (a 62% 3724 - 38% 3726 blend)
The barrel was also inoculated with ECY34 Dirty Dozen Brett Blend and Wyeast 5223 Lactobacillis brevis. We opted out of adding funkier stuff (anything with Pediococcus) because we didn't want to let things like ropyness constrain when we could make our first pull of the beer, though we plan to add other microbes down the line.

Other:
Gypsum and CaCl2 were added to reach final concentrations of roughly 90 ppm Ca, 150 ppm SO4 and 50 ppm Cl-.
Each kettle got 1/2 tab of whirlfloc per batch.
Each kettle got about 1.5g Wyeast yeast nutrient per 19 L/5 gallons.

The yeast was pitched at about 68 F (20 C) and the carboys rose or were raised to ~80 F (26.7 C) by the third day. They were held at this temp until the 5th day, when the heat was turned off and they fell down to ambient (~59 F / 15 C). On the 6th day the carboys were racked into the barrel. They were still active and pretty cloudy, but whatever trub had settled out was left behind. 12 carboys were racked in (filling the barrel a bit more than our plan and therefore not leaving much headspace for the continued fermentation), leaving one full 6 gallon carboy out of the barrel. One of the empty carboys was used to collect any barrel blowoff.
Racking week old beer into the barrel
Our (very) full 60 gallon barrel and its carboy for blowoff.
I'll fill more in as we go with notes of the barrel aging to come.

Sunday, November 30, 2014

Petite saison rebrew tasting notes

Setting up for the tasting.
With this batch of petite saison I wanted to work out yeast blend ratios. There were 4 treatments total:
A) 70% Wyeast 3724, 30% Wyeast 3711
B) 90% Wyeast 3724, 10% Wyeast 3711
C) % Wyeast 3724, % Yeast Bay Wallonian Farmhouse, % Wyeast 3711
D) 90% Wyeast 3724, 10% Wyeast 3711 (though at a lower pitching rate than the above treatment) with additions of Yeast Bay Lochristi Brett blend and Wyeast 5223 Lactobacillus brevis

To mildly confuse things, I had labeled the bottles of treatment A 60/40 blend and the bottles of treatment B 80/20 blend based on what I though I did during blending, but as I found out from calculating my blends it turned out to be about 70/30 and 90/10 respectively. Through tasting these beers on their own I had formed some general opinions of how I felt about them and how they compared but in order to really figure out what the blend ratio did I needed them side by side. So I set up a somewhat blind tasting. I knew the beers - the three 'clean' (no brett/lacto) treatments form above plus my previous batch of petite saison, leaving out the brett and lacto petite rebrew treatment (D from above). And I poured them myself so I knew a bit about appearance. But then they were re-arranged and arbitrarily numbered for me given to me a minute or two later.

From tasting these beers individually while knowing what they were (and maybe pouring them, though with the exception of the previous batch with a different grist and therefore color, the differentiating characters were mostly taste and aroma based) I was able to correctly identify the different blends but it ended up being hard to determine which was the 90/10 blend and which had Wallonian Farmhouse. They were identifiably different but not necessarily in a way that I could pin to the yeast blends. I am not very familiar with Wallonian Farmhouse at this point and that probably contributed.
The poured glasses. As you can see there are some visual differences
Glass #5 (later revealed to be treatment A from above, the 70/30 blend)

Aroma: Peachy and floral with mild lime stand out. This one has more green fruit (in a slightly under-ripe way). There is a nice minerally character that is pleasant. This has a mild peppery spice and mild apple and it is more herbal than the other glasses

Appearance: Large white head, great retention, nice lacing, clear brilliant copper

Taste: Tangy lime, thinner flavor than the others with sour and green fruit. It has a dry finish and comes across medium-bitter. Overall the flavor is green and under-ripe fruit forward with low pepper.

Mouthfeel: fluffy light body with high fine carbonation, the carbonation feels a bit higher than the other blends and the body may be a bit thinner, but that might be influenced by carbonation.

Overall Impression: 3711 beers have an identifiable character to me that I would describe as green slightly under-ripe fruit with yeast. I know that's sort of a poor description but I don't really know how to convey the flavor. Either way that is what I identify with 3711, and this beer has more of that than the others. From that I was able to identify it as the 70/30 blend. It was the most 'green' and had less peach and orange citrus. There was a nice tang and spice but I want more 3724 flavor in the balance overall.

Glass #12 (later revealed to be treatment C from above, the blend with Wallonian Farmhouse)

Aroma: There is more 3724 character overall and the beer is more doughy/bready with mildly tangy citrus and tropical fruit (like mango). The aroma has a bit of a character I associated with stressed 3724. It has a sweeter aroma and is more tart than the others.

Appearance: Medium head, lower than #5, the head is a bit chunkier, brilliantly clear pale copper

Taste: Tangy citrus fruit, unique, peach, doughy/bready, unique tropical fruit in this treatment. 3724 character is in there but it is less identifiable than in other treatments, it comes across crisper than #9 (which might be influenced by the tangyness). Nice but it could use a bit more hop character.

Mouthfeel: Fluffy body, nice high fine carbonation

Overall Impression: Great citrus and tangy fruit. The character is a bit like what I got out of a saison brewed with Logsdon Seizoen dregs a while back (sidenote, this Logsdon dregs beer was what I sent to the first round of the 2013 NHC which came out a fair bit different from what I sent to the final round). This version is a bit more reigned in than that Logsdon version. The fruit is unique and different from what I usually get. I think this is the Wallonian Farmhouse version and #9 is the 90/10 but it is hard to tell.

Glass #3 (later revealed to be the previous batch of petite saison)

Aroma: Floral, fruity candy, pear stands out. The classic Dupont aroma is there. There is nice malt and a stronger noble hop character but also some slight oxidation.

Appearance: Slightly paler and more of a golden color than the other three glasses. Large white head with great retention and nice lacing.

Taste: This has more of the classic Dupont floral character with a touch of pleasant sulfur. It has a dry finish with nice hop charatcer and a light tangyness. The hop flavor in this one is good and is more in line with what I am looking for out of this recipe.

Mouthfeel: Fluffy/creamy body with high fine carbonation. Less tangy than #12. The hops contribute nicely to the body.

Overall Impression: The other glasses are missing this hop flavor and I like the Dupont-esque mild sulfur. The fruit is slightly more restrained in this and I really like that. It is still pronouncedly fruity but is a bit more refined. Maybe over-expressed fruit is what I mean when I talk about stressed 3724 character. At it's prime this version was the best. I may still prefer this malt bill to the malt bill I used in the re-brew.

Glass #9 (later revealed to be treatment B from above, the 90/10 blend)

Aroma: This version is the funkiest and is seems complex than the others. Strong peach and 3724 character. There is a nice doughy character in the aroma. There is a bit of stressed 3724 with strong floral. A bit of sharpness almost like what cheddar has and if I didn't know what went in here I could believe that there was some mild Brettanomyces.

Appearance: Very similar to #12 with a low white head and good retention.

Taste: Strong fruityness dominated by the classic peach character I associate with 3724 and a mild green fruit that I associate with 3711. There is a touch of brett-like funk and doughyness and a touch of sulfur in the finish (though it is less smooth and pleasant than what I find in Dupont saisons). Nice citrus fruit (tangerine) and floral. Nice malt character but I want more hop flavor and bitterness.

Mouthfeel: Great creamy/fluffy body. High fine carbonation. I want more hop character.

Overall Impression: The darker color in glasses #5, #12 and #9 compared to #3 is nice but I'm not sure the darker malt bill benefits the flavor. Maybe I'll go back to the original malt bill. And if I decide I want the darker color maybe I'll add a bit of Carafa-type malt for color adjustment. The perception of funk is nice here and I'm not sure where it is coming from. It could be that something else got in, and if so it's pleasant, but I'm not convinced about that. It could also be a combination of the tangyness, malt and slight sulfur. In the 4 tasting this is my preference, but only slightly.

The revealed identities of the saisons.
Closing thoughts: Overall these were very similar. that may not be reflected in my notes because I was looking for differences. Especially the 90/10 and Wallonian Farmhouse bottles. With what remained in those bottles I compared them head to head and may slightly prefer the Wallonian Farmhouse in a 2-way tasting. I should redo a 2-way tasting to test that. The WF batch is slightly more assertive than the 90/10 due to the tangy citrus and tropical fruit. One theory I have for this at the moment is that in a 4-way tasting I might be tasting more for what I think is the best saison for my palate but in a 2-way tasting I might choose the beer that stands out pleasantly. Looks like I have to do a new 2-way for these two.

Monday, November 17, 2014

Dark English Mild

Heating up the strike water
There's been a bit of delay in my getting a post up on this blog, but the Hors Catégorie facebook page has been getting lots of regular brewing updates including a nearly 70 gallon brewday of saison which is now waiting to go into a 60 gallon wine barrel, a 10 HL batch of saison which was a collaboration with a local brewery, blending of sour barrel aged beers, and a string of the posts about the general saison-related stuff I find myself doing on a weekly (if not daily) basis. But I finally got a bit of time to put up a new post. I've been brewing a lot of saisons lately and although I love saison, I was ready to try out something different for a batch or two. Having to prepare 10 gallons of old ale for a barrel aging project and a mistake for one of my yeasts in a shipment of an East Coast Yeast order (which fortunately was corrected as soon as possible) meant that I had a couple different English strains around. I like having a nice malty but easy drinking beer here and there, and as with my saison brewing, lately I've been focusing on trying to make lower alcohol beers with great flavor. So a dark English mild was a natural choice.

My ground malt and the dark grains cold steeping
I found a dry toasty/mildly astringent character that I don't really care for in some of my previous batches of mild and I also find it with some commercial milds I've tried. It is kind of like the flavor of sunflower seed husks. While I don't find it awful, this flavor (which I think may be enhanced by the thinness of the beer) is something I am looking to avoid in milds. I wanted to try ways to get a darker malt character without that so with this batch I tried cold-steeping my grains - my first use of this technique. In brief, the theory behind/advantage of this is that you don't pull out as many rougher flavors like tannins with the cooler temperatures which still getting the color and much of the dark malt flavor out. The liquid you get from this can then be added back at late in the boil, to the hot wort, or straight to chilled wort or the carboy. There are plenty of places to learn more about cold steeping of grains, such as the article by Chris Bible in the October 2014 issue of BYO magazine.

I cold steeped my grains in a 1 qt mason jar, which was an excellent vessel for this sort of thing. The only downside I found in my approach was that my water to grain ratio was way too thick and as a result of this I did not get very complete extraction. I would have needed multiple mason jars for the amount of dark grain I used. In subsequent brews with less dark grain a 1 qt mason jar has worked great, and when I use this much grain again I'll split it into 3 or so mason jars. So anyway, the day before brewday I started cold steeping. With this batch I decided that I would add the liquid from my steeping at the end of the boil, so with 10 min left I poured the contents of the jar into a fine mesh hop sack which I held above my kettle. This is the point where I realized too much of my water was still hung up in the grain and I didn't have a bit of rinsing water around. So my utilization of the dark grains was pretty low on this batch and I'll be ready for next time with a thinner dark steeping.

My (not very dark) mash runoff
The wort was split into 3 carboys with 2 of them getting WLP007 (one of these two also got a small amount of oak) and one getting ECY18. I figured this was a great way to take advantage of the accidentally getting sent a vial of this yeast and to see how the ECY18 English Mild yeast compared to other English strains. By now these three carboys are all bottled up and bottle conditioned (1-1.5 weeks in primary was fine with an appropriate pitch of rather flocculant yeast in a low OG beer like this) and while I've had each of the three treatments at this point, I'll wait a bit more until reviewing all three.


The Recipe

Brew Day: 19 October 2014
Batch Size: 13.5 gallons in carboys
OG: 1.034
IBU: ~14, Tinseth formula
FG: 1.011 for the two WLP007 batches and 1.012 for the ECY18 batch
ABV: 3.0%
Color: about 20 SRM (I haven't really looked too closely to get an exact number yet).

Grist:
10.6   lb (4.81 kg) Doehnel #24 (UK style light malt, ~1.9 L) -                     63.9%
1.75   lb (790 g)    Doehnel #26 (North American style light malt, ~1.9 L) - 10.5%
1.5     lb (680 g)    Brown Malt -                                                                      9.0%
1.25   lb (567 g)    Crystal 60 L -                                                                     7.5%
1.0     lb (454 g)    British Crystal 135-160 L -                                                6.0%
0.375 lb (170 g)    Hugh Baird Chocolate -                                                     2.3%
0.125 lb (57 g)      Weyermann Carafa II Special -                                          0.8%

*Note: I talk a bit about Doehnel malts in earlier posts like this one. These malts are grown and produced locally by a small maltster. The color and general style allow closest substitute malts to be chosen.

Hops:
33 g Slovenian Aurora 8.0% aa boiled for 60 minutes

Yeast:
WLP007 Dry English and ECY018 English Mild
1 tsp Wyeast yeast nutrients

Other:
Victoria's water is very low in minerals so salt additions are basically the final concentrations.
9 g CaCl2, 5 g CaSO4 in 30qt sparge
13 g CaCl2, 7 g CaSO4 in 43 qt sparge
1 tab whirlfloc

28 g oak - a single piece which was cut from a section of an oak chain from the now defunct Okanagan Barrel Works. This oak went into the primary of one of the carboys and stayed in until the beer was bottled (11 days). I prepped it by rinsing it a couple of times with boiling water and then soaking it overnight in a mason jar full of boiling water. This definitely strips out some of the oak but I was more worried about over-oaking than under-oaking. Also I didn't want to pick anything up in a beer like this, which due to it's low hopping, low alc, and low percent of attenuation is especially susceptible to contaminant microbes.

Mash and Fermentation:
I mashed at 156 F (68.9 C) for 60 minutes. For the fermentation I pitched at 64-65 F (17.8-18.3 C) and kept it there for the first 48 hours. I raised the temp to 68 F (20 C) over the next day (the ECY18 carboy got warmer because I neglected to check the setting of my aquarium heater) and I held this temp for 2 days before letting the beers return to room temp and bottling (at day 7 for the WLP007 carboy, day 10 for the ECY18 and day 11 for WLP007 + oak). The difference in bottling times was driven by how much time I had to bottle rather than each carboy needing different amounts of time.

2016 Update: I'm long overdue in linking the tasting notes into this recipe post. Here are the tasting notes for this brew.

The WLP007 plus oak took first place in the first round (Seattle) of NHC 2015 and scored in the upper 30s in the final round but didn't place. I stored bottles in the fridge but didn't rebrew it, or rather, changed some parts of the recipe in the rebrew and the rebrew wasn't better than the original. Although there was time I didn't want to try again going back to the initial recipe (I had my fill of dark milds for a bit) so the bottles I sent were well past their prime by the time the final round came.
 
My finished wort was much darker than the mash runnings due to the cold-steeped malt