Friday, September 26, 2014

Sour-Worted Soma

One of my main homebrewing projects/focuses for the next year is developing ways to get a reliable and repeatable tartness or light acidity into beers which I ferment 'clean' (meaning without Brettanomyces or bacteria, only Saccharomyces). My basic goal for doing this is to ferment a 'clean' beer in a normal ale time frame while still achieving a refreshing tartness. I am definitely not interested in using this method to provide all the acidity in a beer that is fully sour. For these beers I will still use mixed fermentations, where the flavor development during a slow acidic fermentation will result in what I think is a much better beer than relying only on quick pre-primary souring. I talked about more about my motivations for pre-primary souring and methods like sour worting in this post.

I've frequently used pre-primary souring methods in my saisons to add a tart edge to an otherwise normal beer. I find this helps the refreshing aspects of the beer and, in this style, that refreshing character is an important part of what makes the beer. Usually I use acidulated malt out of ease, but I've done some sour mashes with good results. This beer is based off a recipe which I initially sour mashed, but this time I wanted to try sour-worting (which I learned of from the Mad Fermentationist). This technique involves souring wort with Lactobacillus and then re-boiling this soured wort and fermenting it without bacteria. In my case I decided to only sour a portion of the wort which I pulled off a previous batch and I would blend back in during the boil of this beer.

The soured portion after adding it back in the boil
A couple weeks before this brew I brewed a similar saison which ended up going into an oak barrel, and I took the opportunity to produce some extra wort to pull off for souring. I decided I would leave the batch at room temperature as I had time to wait and while lacto may thrive at elevated temperatures, it certainly works fine at ambient temps as well. There was a small snag, that I didn't have any Lactobacillus around. So I used the dregs for The Bruery's Hottenroth, a beer almost completely fermented with Lactobacillus. Unfortunately I didn't get a chance to make a starter with that and while it did add a bit of acidity, it took some time to get going. Fortunately I was able to pick up a pack of the Wyeast seasonal Lactobacillus brevis. So after about a week and a half of mild souring I added a the lacto, which dropped the pH down to 3.5 over the next week. At that point I was happy with the acidity of the sour-worted portion and I was ready for the brew day. I've made sure to leave some of the wyeast lacto around so that I'm prepared for future sour worting trials and I don't have to go through quite as much extended pre-souring.

Recipe
Target OG: 1.052
Volume: 7.5 gallons
IBU: ~25-30, though I didn't end up calculating it for this batch
FG: ~1.002-1.001
ABV: 6.7%

Grist:
86.4% Doehnel malt #25 (1.5 L light pilsner), more about Doehnel malts here
9.1% Doehnel malt #27 (6-7 L Light Munich)
4.5% Acidulated malt (Weyermann)

Hops:
85g Czech Saaz pellets, 3.6%aa
29g Hallertauer Mittelfrueh pellets, 4.8% aa
57g Tettnang pellets, 4.3% aa

Yeast:
1/2 tsp Wyeast yeast nutrients
My standard Wyeast 3724 and 3711 blend (more about blending here)
Dregs from The Burery's Hottenroth
Wyeast 5223 Lactobacillus brevis
Yeast Bay Lochristi Brett blend

Salts and other:
8 g CaSO4, 6 g CaCl2 in 6.5 gallons of mash water (+120 ppm Ca2+, +181 ppm SO42-, +79 ppm Cl-)
5 g CaSO4, 2 g CaCL2 in 4 gallons of sparge water (+101 ppm Ca2+, +184 ppm SO42-, +43 ppm Cl-)
Note: Victoria's base water is very low in minerals, so the final mineral concentrations are basically the same as the added concentrations.
1 tab whirlfloc

The Mash
Mash Plan:
146F (63.3 C) for 50 minutes, 5-10 minutes of recirculating with heat to raise the temp to 154 (67.8 C) for 20 minutes. 1/2 of the acidulated malt will be mashed with the rest of the grist and 1/2 will be added to the mash with 10-15 minutes left. I overshot the 154 by a bit and ended up spending the last 20 minutes between 156 and 158 F (68.9-70 C). This shouldn't really be a problem as the bulk of my conversion happened during that first 50 minutes and the second step is to finish everything up quickly (and it would probably happen more quickly at 156-158F/68.9-70 C). So it should not have a huge influence but it was definitely not my goal.


Collecting runnings
Boil Plan:
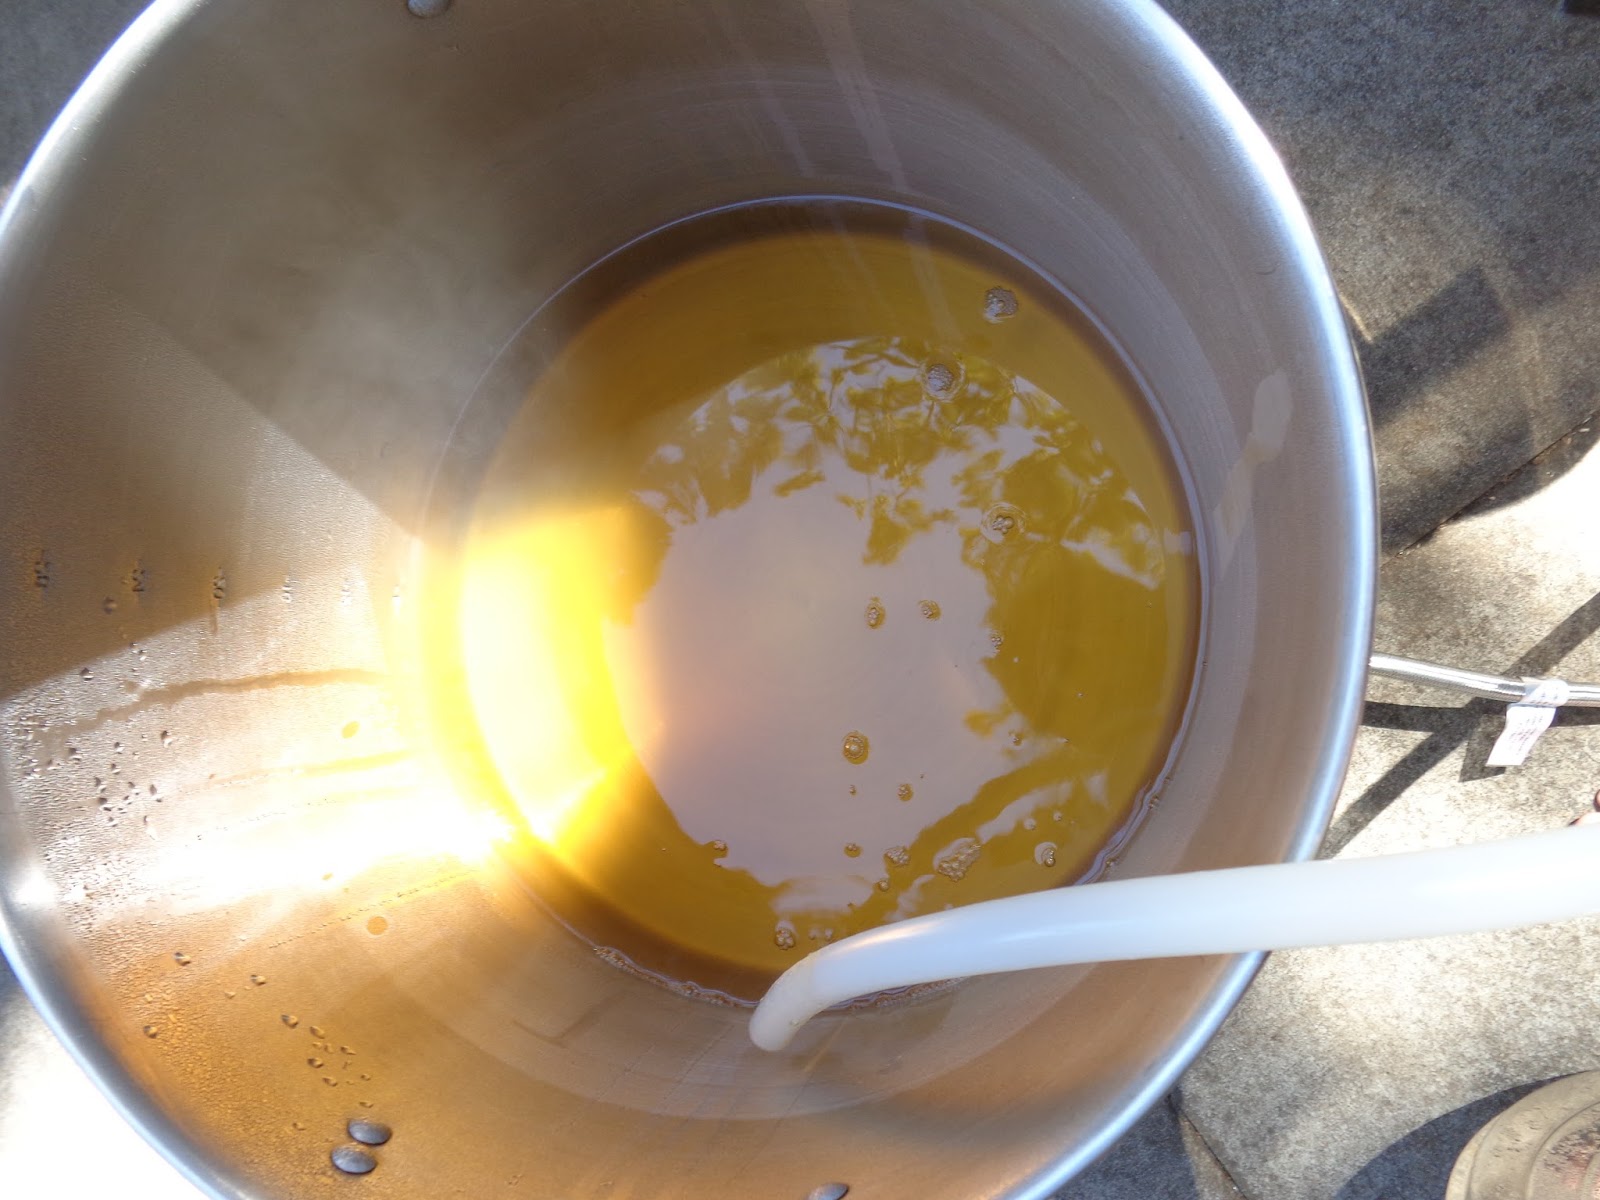
90 minute boil. After 30 minutes of boil the sour portion (now at pH = 3.5) will poured into the wort. A small portion of the soured portion will be left behind and final wort will be added back to the sour carboy to allow the beer to continue to sour with lacto in the primary. 3 hop additions: 42 g Tettnang and 56 g Saaz with 20 minutes left in the boil, 15 g Tettnang and 15 g Saaz with 5 minutes left in the boil and 14 g Saaz and 28 g Hallertau at flame out for a 15 minute hop stand.

About to finish the boil
After blending in the pH = 3.5 soured portion to my pH = 5.1 wort, the pH dropped to 4.2. It smelled nicely lactic and tasted good at this point. You do have to be careful with too low of a pH inhibiting Saccharomyces (I don't know what a typical threshold value would be), but I didn't notice any problems like that with this batch.

Fermentation:
I used a blend of 3724 and 3711 (~80% 3724 and ~20% 3711, ~255 billion cells total) into the two carboys - one clean and the live lacto carboy with wort added back in (more on how I blend yeasts here). I pitched the blend at 68 F (20 C) and steadily to 78 F (25.6 C) over the first 2 days. I held the temperature steady at 78 (25.6 C) for the next 4 days and then at day 6 I raised the temp to 80 (26.7 C) until the beer reached it's terminal gravity, at which point I turned off the aquarium heater I was using to keep it warm and let the temperature fall down to the upper 60's (~20 C), which is my room temperature.
The bottled beer

I bottled the beer on August 12th. I am reasonably happy with it and find that it is improving with a bit more time in the bottle. I'll give it full tasting notes in the next week or two.

Sunday, September 21, 2014

Yeast growing and blending

Many homebrewers out there have a good idea how to grow yeast into pitchable quantities from smack packs or tubes and then pitch this into wort, so this will mostly be focused on how I grow up vials/tubes of yeast into multiple vial/tube equivalents of known cell counts as well as how I do my yeast blending and why I do it that way.

Generally when I am blending yeasts where the blend ratio is important to me I am brewing saisons. But there could be other reasons out there that folks might want to blend yeasts and this works just as well. I don't apply this approach to adding Brettanomyces to beers. When I am brewing mixed fermentations with brett I usually just add a (relatively) small amount of cells (either after primary or when I add my primary yeast) and don't worry much about pitching rates. Okay, so on to the first step, growing the yeast.

Sanitizing jars
I get packs/vials of the individual yeast and grow them up on a stirplate, usually in about 2 L increments because that is convenient sizing for me. I do this whether or not I will end up blending yeast. According to the Mr. Malty pitching rate calculator, 1 fresh vial/pack (~100 billion cells) into a 2L starter on a stirplate yields about 300 billion cells. When the starter is done I cold crash it, decant the starter wort (it is important here to use a magnet to hold the stirbar out of the way so it doesn't disrupt your settled yeast cake), pour in boiled cooled water to stir up the yeast cake until I get a roughly homogenous slurry and then split the yeast equally into 3 mason jars. I now have 3 equivalent vials/packs from the one I started with (which I why I chose the 2 L size to begin with).

Filled with boiling water to cool
With these jars I will now repeat the process to get either the quantity of yeast I'll want to pitch for a future batch or to split again into 3 jars of approximately 100 billion cells each. Sometimes I'll split into more or fewer jars and/or grow at different numbers of cells, but these are probably the most frequent ways I do it. When I have this process on the go for multiple different yeasts at once, as I usually do, it is important to keep good notes of what is going on. I keep a piece of paper as a log for all the yeasts on the go of when I made starters and how many cells I expected them to produce. And each jar gets a label of what is in it, when it was added to the jar, how many cells I think are there, and what generation of cells it is (I treat the vial/pack as generation 0, the cells I've grown from the first starter I call generation one, and cells I grow from a generation one jar I call generation 2, and so on).

Magnet the stir bar out of the way so it doesn't disrupt the yeast cake
Growing up yeast in this way has two main advantages that I see:

1) I keep a relatively good constraint on my cell counts. I am not actually counting cells with a microscope and a hemocytometer, but I trust the work behind the Mr. Malty calculator and they numbers it gives. And even if my numbers are wrong, they will be wrong consistently so this won't really be a problem. By pitching rate trials where I vary the cells/ml/degree Plato added to a given beer, I will be able to determine if, with my process, under or overpitching to a standardized value is best. And I can adjust what I am doing until I am happy with the results, regardless if that makes me 'overpitching' or 'underpitching' relative to a calculation. Bottom line: process is controllable and consistent!
Three roughly even splits of the yeast

2) I feel that the dirtiest parts of my process are chilling, where the lid of my pot is cracked open to fit my immersion chiller and therefore the cooling wort is susceptible to airborne bacteria and yeasts, and at bottling. Not specifically the act of bottling making the beer in the bottles unclean, but bottling making the neck of the carboy (which I will have to pour a yeast cake over) unclean. Growing all my yeast on stirplates does take a bit of time but it avoids the possibility of introducing and concentrating bacteria and wild yeast picked up through the entire brewing process.


So overall, I feel I am able to more cleanly grow yeast on a stirplate and it gives me good and repeatable control on cell counts, which is not something you get from a yeast cake. And having some constraint on cell counts will be necessary if you want to blend in any sort of regular and controlled way. So now that I have jars with controlled amounts of different yeasts, how do I go about blending them?

~100 billion cells each of  2nd generation WLP 007 added to jars on Sept. 18th
First you'll need to have wort around that you want to blend yeasts into, and of course those yeasts. If you have a known volume and strength of wort (going with your target numbers will work fine here for setting the blend up, but being prepared to make minor adjustments if you don't hit your targets is probably a good plan) then you can figure out how many cells you are ought to add with the Mr. Malty pitching rate calculator. Now you need to come up with a blend ratio of your yeasts. Choose a ratio based on yeasts characteristics like flavor profiles and what you are looking for in your finished beer as well as other yeast characteristics like attenuation. If you don't have one in mind or your ratio is flexible, you can choose one based on what is a convenient split for the yeast counts you have around.

Let's say you have one yeast around at 100 billion cells/jar and another at 50 billion cells/jar and you wanted to target something like 70% yeast 1 and 30% yeast 2. And let's say the Mr. malty calculator says you need 250 billion cells for your wort. Well 2 jars of 1 and 1 jar of 2 gets you right at your target total cells and is a blend of 80% 1 and 20% 2. If that is an ok blend ratio compromise for you, mix the three jars together into one of the jars (it might be helpful to pour off some liquid from the jars first so they fit fine), stir up the mixture and add it to the carboy (or you could just add the 3 jars individually).

If you run into a more complicated situation where you need to split up jars, split one blend into multiple carboys, or try the same 2 yeasts in different blend ratios in 2 different carboys, it might get a bit trickier. But definitely still manageable. It is challenging to blend cleanly by volume, but quite easy to do so by weight. The only issue is that if you over-pour, you generally can't take it back.

To work this out you will want to either know the masses of your jars when they were empty or have an empty jar of the same type around for an approximate empty mass. Let's look back at the situation above to work this out: wort that needs 250 billion cells and you want to add 70% yeast 1 and 30% yeast 2. Well, 0.7*250 = 175 billion cells of yeast 1 needed. So 1 full jar and 3/4 of a second at 100 billion cells/jar. Now if you weight the full jar and either weigh a similar empty jar or know the tare weight, you will know the mass of liquid and yeast in the jar. If you mix this up so it is roughly homogenous, you will be able to calculate the mass of 3/4 of that liquid. So now you can pour out until you have poured 3/4 of the weight into the first jar (pouring a bit less than you think, checking, and adding more if necessary is a good safeguard here). It helps to have a second pair of hands for writing down numbers and helping to remove lids, but it can definitely be done alone. Now you will need to follow the same process with yeast 2 to achieve 75 billion cells. In our example at 50 billion cells/jar that is 1.5 jars. So one full jar added to the other mixture and half of a second, with the second jar split in half as described above.

The more you go through this pouring the better you'll get at it. And don't worry too much if you mess up and pour too much. As long as you've recorded the masses you poured, you can calculate what you did and you can re-create it in the future or compare it to another blend next time. It obviously gets more complex as you introduce a 3rd yeast, different blend ratios of the 2 yeasts into multiple carboys, or the same blend but into 2 carboys of unequal size (in this last case just calculate how much you need in each carboy as well as how much you need total, then make the blend for the total amount in one jar and pour by mass into the 2 carboys). If this is something you'd like to try, and it can work pretty smoothly once you've gotten used to it, I'd suggest starting with some simpler blends to get a hang of the process. And if all that seemed like too much work or it's not for you, the first parts of growing up yeast cultures are a great way to stretch one pack/vial into multiple batches while being able to have good control over pitching rates.

If you're looking for more info on blending yeasts, Kara Taylor from White Labs gave a talk at NHC in 2014 about the topic (old NHC seminars are freely available to American Hombrewers Association members). And Zymurgy had an article in the May/June 2013 issue.

Also, here is a worked example of what I did for a more complicated yeast blend involving three yeasts and three different clean (no brett or bacteria) treatments in carboys.

Saturday, September 13, 2014

Rye Spiced Saison tasting

It's been almost 2 months since the brewday for my rye spiced saison and about time I got tasting notes up. Overall I am reasonably happy with this but my memory of my first batch is that it is better than this one. The big thing I think I'll change for next time is lowering the amount of rye and lightening the malt overall. But all things considered this is a good base to work off of for next time.

Aroma:
Spicy rye comes through strongly. There is a strong woody spice with some pepper, and the fruity yeast character is of golden raisins and grapes with some stone fruit (like plums and a bit of peach). The ester character/fruityness is good with more grape and less stone fruit in the aroma than in the taste. The aroma overall is more balanced toward spicy/phenol character. The rye probably helps that out a lot and the rye is very forward in the aroma. Although a lot of these descriptors (like the grape and plum) might sound dubbel-like, the beer has definite differences from what you might find in a dubbel. The fruityness is a bit lighter and the spicy characteristics are different. There is a mild bubblegum aroma, but I didn't notice it until I specifically looked for it.

Appearance:
Pretty chestnut color, hazy. Has a thick tan head with good retention and nice lacing. Overall it is quite pretty.

Taste:
Again the rye is rather forward. There is a cool combination of spices and yeast-derived esters which I think it at least partially driven by the juniper. It is mildly resinous and has a surprising bitterness in the finish. The pepper is a bit forward and adds a bit of roughness to the bitterness in the finish. The fruity character is stone fruits and grape/raisin like the aroma, but with the balance more toward stone fruit. There is a rich malt character with a strong munich character and dark rye.

Mouthfeel:
Medium/light body (I think the rye adds a a bit of viscosity which increases the perception of body). There are hints of warming alcohol. The carbonation is high and pleasant. There is a light tartness in the finish, probably from the levels of acidulated malt.

Overall:
I think for my tastes I should drop the rye levels a bit and also drop the pepper a bit. It is a touch rough in the finish (I think lowering the pepper may help this, and maybe also lowering the acidulated malt) and it comes across as more that the 20 or so IBUs it calculates out to be. I think I'll move forward with this recipe in two different directions:

1) I'll go for a lighter beer (in color, body and strength) using a base of pils plus a good amount of munich and a bit less rye. I'll keep the spices the same and drop the pepper a bit.
2) Keep the base and maybe make it a touch darker and brew it as a winter oriented rather than fall oriented saison. I'll probably go with more carafa or something like that. And I'll change up at least some of the spices.

Monday, August 18, 2014

Introduction for Pre-Primary Souring

I'm headed out to sea for a couple weeks of work and I wanted to get another blog post in before I go. This post is an introduction to one of my big projects for the next year of brewing - pre-primary souring. I've got one batch in bottles where I've used one of the approaches here but I'll have to wait until I come back to write up the brew day and give my tasting notes. This is pretty text heavy and picture poor, but I'll update it with pictures as I take more of these various approaches again with a camera around.

My goal with pre-primary souring in my homebrews is to get a controlled amount of tartness into  beers in the same sort of time frame as a typical primary fermentation. And also to not have live souring microorganisms in the fermentation and bottle. I am not try to make a quick sour beer or re-create the sort of fermentation profile you find in classic sour beers like flemish sours and lambics. And I am not trying to do 'pre-primary' sour in lieu of live souring during my primary (or in a secondary) fermentation. I think for beers you really want to be sour, putting in the time and letting the longer mixed fermentation will contribute more to the final flavor profiles you're looking for. Instead I'm interested in pre-primary souring to add lower levels of acidity to beer styles which I think would benefit from it. I'd like to get a controlled mild to moderate tarntess into certain beers like some of my saisons. In scenarios where I am really going for more of a sour character I may use this sort of approach to help out the microorganisms I want (as some microbes like Brettanomyces and Lactobacillus benefit from a lower initial pH), but when I am looking for a real acidic beer I'll stick with the long mixed fermentation of bacteria and yeasts and I feel that contributes to the flavor profiles I'm looking for in addition to the tartness.

So what do I mean by pre-primary souring? It is introducing some acidity to the beer before I begin my primary yeast driven fermentation. This can be achieved in a couple of ways, and the reason that I'm targeting souring before the primary is that it gives me the control I want. I'd like a more controllable/repeatable level of acidity as well as independent control of bitterness and acidity. If I were blending an acidic beer post-primary with a hoppy beer, I lose this control. The more acid beer I add, the less hoppy beer I get. But souring before my primary, and boiling (or re-boiling) the soured wort allows me to adjust the hop levels to what I want after the acidity is set. Some of the ways that you can do sour a beer before the primary are by adding lactic acid or acidulated malt, by sour mashing, or by 'sour worting'.

Adding lactic acid - I won't really cover this as I think it is pretty simple. Basically if I were going to add lactic acid for residual tartness (not mash pH) I would do it to taste after primary fermentation is done. This may influence yeast character as the yeast would be fermenting at normal pH rather than lowered pH (as is the case in all other methods below). Basically lactic acid is the most one dimensional approach and that's not really what I'm going for.

Adding acidulated malt - This is a step up from adding lactic acid in my mind. Maybe not a considerable step but I think there are some important differences. Although Weyermann doesn't give the details on their website, I believe the lactic acid character in acidulated malt is achieved by spraying the malt with lactic-fermented wort. Whatever the method, it is derived from natural lactic acid production by bacteria, meaning that any 'impurities' (other flavor compounds one might get from lactic acid bacteria) would also make their way onto the malt. Some of these may volatilize off in the boil, but it is still less pure than lactic acid. For simple tartness I lean this way as it doesn't take any extra time and requires only a minor amount of extra work over adding pure lactic acid (though I suppose you do lose a bit of control). Sourness form acidulated malt is pretty one dimensional but for achieving mild tartness I find it clean and pleasant.

Although I may add up toward about 10% (by weight) acidulated malt into a batch, I usually don't add more than about 6-8 oz (170-227 g) into a main mash for ~5 gallons/19L. I'll do my mash with this first bit of the acidulated malt and then add the remainder with about 15 minutes left in my mash when the bulk of my conversion is done so that I don't alter the pH drastically and affect conversion for my whole batch. With my water as it is and the salt additions I usually do, the first portion brings my pH to around 5.2 in a pale grist. I haven't measured pH after I add the second portion so I don't know if it would really affect conversion, but the method I use seems to work well for me. I find that I get fine conversion on the second portion added (I usually don't mash out hot enough to denature enzymes so the acidulated is converting for 15 minutes and then through my whole lauter and sparge). Adding 7-9% acidulated by weight seems to give some mild tartness, but not to the degree or complexity as one may achieve from the next two methods. Even so, this is the normal go to method I use for many beers at this point.

Sour Mashing - I've tried this approach and I liked in in the recipe for my saison named Soma and also another saison. The approach I took is detailed in the Soma recipe. Basically I did a small stovetop mash a day or two before brew day and then incubated it at 100-120 F (37.8-48.9 C) until I was running off my main mash, at which point I blended the sour portion back in. It is very important to keep out O2 in a sour mash, and dropping the initial pH a bit with acidulated malt and/or lactic acid helps select for the bacteria that you want. Sour mashing can give you the most complex flavor profile but that isn't always a good thing. It is the least controlled of these methods and the most difficult to do repeatably.

The remaining sour wort portion after most has been added to the kettle
'Sour worting'  - I first heard this term from the Mad Fermentationist (there's some info from him here and here). It is sort of taking an approach that one might find in Berliner weisse brewing process where pure lactic acid bacteria are added to wort without any Saccharomyces (or any type of yeast for that matter). From this point when the fermenting wort reaches the desired pH the wort can either be re-boiled, killing off the bacteria, or yeast can be added. This approach with blending back the souring portion into a boiling wort allows the most control as pH can readily be monitored and the blend volumes can be controlled well to lead to the beer you want. Blending in the boil also allows independent control of hoppyness (same for the above methods) as the souring is done, the bacteria are killed off and hops can be added to whatever degree you like (it is slightly more complicated than this, but I'll get to that later). It also has the added benefit of allowing you to leave a bit behind in a carboy which you can later top up with cooled wort, giving you a head start for a 'live' sour beer.

When I've taken this approach (for example in this saison) I made a bit of extra unhopped wort from a beer with a similar grist and pulled it off before hopping it. Then I pitched the lacto and waited until it was around where I wanted it before brewing the beer it would be blended into. This takes the luxury of a flexible brewing schedule, but if you are less flexible you can always wait longer and let it get more sour than you want and then use less of the sour wort to a similar final result.

Alright, so there's a quick rundown of approaches for adding acidity to a beer before a primary/yeast fermentation. When I get back from work at sea I'll write up my experience so far with the sour worting approach and get to work with some more trials.

Monday, August 11, 2014

Petite Saison Tasting Notes

The goal for my petite saison, as I talked about in the recipe and brewday post, was something like the excellent low gravity saisons I had in Belgian and northern France (Dupont's Biolegere and Thiriez/Jester King La Petite Princesse). I wanted something very light and refreshing around for the heat of summer and this beer matched that very well. Here are my tasting notes and any changes I might try to implement in future batches. There will definitely be future brew of this and I even have a re-brew of this beer currently fermenting.

Aroma:
There is a great fruity and floral yeast character (citrus and peach/apricot are most prominent, with some tropical fruit) typical of saisons. There is a very mild chalky/minerally character that I find in quite a few commercial saisons which I find pleasant in low levels such as it is here. There is some nice noble-type hop spicyness, possibly mixing with yeast phenols, which counters the floral/fruity character quite well. The yeast character really dominates the aroma and I don't get a whole lot of hop and malt coming through here.

Appearance:
A good white head, not as giant as in many other examples but certainly there and with good retention. Medium bubble size, but settles to a fine and pretty ~1cm mousse-like head. The color is hazy gold though I've had other pours that were pretty clear, so I probably didn't let this bottle settle enough.

Taste:
The fruityness is forward, with a bit more pear than the aroma suggests but still with citrus and peach as the most prominent fruits. There is a mild pleasant grainy character. The malt comes through surprisingly well for a beer with an OG this low, with a nice Vienna/pale Munich character in the finish. The hop bitterness balances the beer really well in the finish. Some milder spicy hop character supports the yeast well but the fruity yeast character dominates, with the malt coming through a bit stronger than the hops. As the beer warms the hops come up in the balance and the malt goes back. The aftertaste is refreshingly dry hop spicy and grainy malt, leaving a crisp finish and inviting another sip. And another, and another...

Mouthfeel:
Creamy light body with high carbonation and a pleasant crisp finish. This is exactly what I was going for in this beer. It is super refreshing and very dry. It seems fuller than the final gravity (1.001) would suggest, which I suspect is due to glycerol (which I discuss here and mention here). This is a compound that adds to the body of a beer which yeasts produce during fermentation, and saison yeasts like the ones I used in this batch produce more than typical.

Overall and Thoughts:
I am really happy with how this came out. It matches almost all of what I wanted, and exceeded my expectations a bit in the malt character. It's dry, light, and super drinkable but with surprising body, which is appropriately light without being too thin, and has surprising malt character. It is comparatively easy to make a low OG beer hoppy (as hops are independent of beer strength), but getting sufficient yeast character when the yeast aren't fermenting much sugar, and especially getting enough malt character when the malt levels are by necessity lower, can be tricky. Even more so for the malt when the final gravity is so low as it is in this beer. So I am really happy with how this malt came across. As I detailed in the recipe post, I used mostly malt produced by a local maltster including a light pils (1.5 L) and a light Munich (6.5 L). If you don't have comparable malts available I would use the palest Munich you can find and maybe substitute 25-50% with Vienna malt to replace the 6.5 L light Munich I used in this recipe. Another pils of the more standard ~1.7 L should be ok for the pils substitution, but I do think some nice grainy character might be coming from using a slightly lighter malt. But that's probably what I'll do in the future when I don't have any more of these specific malts around.

Other than that I don't really think I'd change much. My target was for a beer that was a fair bit lower in strength but through a combination of about 3-4 extra points in the OG and a couple points lower in the FG my ABV is 4.0% instead of the 3.0-3.5% (preferably closer to 3.0 %) of my target. I may try to drop the strength of this recipe down in the future but I am a bit torn about it because I am quite happy with this batch. Either I'll go back to the drawing board on a saison around 4-4.5% and drop this recipe down a bit, or I'll create a whole new recipe for a lower gravity saison and keep this about where it is (or maybe a touch stronger). I suppose I'm leaning toward the first option here to differentiate this recipe more from my average strength, pale, relatively hop forward saison recipe of around 6.5% that I am happy with. But we'll see.

Tuesday, August 5, 2014

Belgian Single Tasting Notes

I often find that I have a lot of individual bottles of beer (homebrew and commercial beer) sitting around waiting for some occasion where I can give them the focus I want. Consequently, I always turn to my recent batches of homebrew for a beer I can enjoy without as much focus. This has the downside of putting off a review, but I like that it gives me some opportunities to think more passively about the beer and come up with some ideas before sitting down to the full review. And often times I find that although the beer may be carbonated after a week or two, it benefits from a bit more conditioning/mellowing time and some previously rough characteristics may have softened more. I find that especially true with many of my saisons, and many of the leading commercial Belgian/French saison brewers have a bit more extended aging time, either in bulk or in bottles, after the fermentation is complete. Anyway, I've finally gotten around to taking some tasting notes on the Belgian single I bottled about a month ago.

Aroma: Very strong noble-type and other European hop presence, the hops smell a bit like hop drops candy (or a really fresh bag of European hops) in the intensity as well as the profile. The Styrian Goldings seem to come through stronger than the Saaz. Yeast character is relatively restrained but there is a nice fruity character with pear and mellower citrus like blood orange. There is a bit of clean crisp malt in the background but overall hops dominate the aroma and yeast lends a nice milder support.

Appearance: Dark gold, fine haze (the haze in the image is mostly condensation), large rocky white head with fine bubbles. The head retention is pretty impressive and a thick lace is left. The appearance was pretty much my ideal for this type of beer.

Taste: Strong hop character, which dominates the overall flavor profile. Great forward noble and spicy/earthy hop flavor, moderate/high bitterness (but appropriate for the balance). There is a bit of vegetal/leafy matter in the finish, the sort of thing one might get from too many hops/too much contact with hops. A nice mild fermentation fruity and floral character (mostly pear with some citrus as well) and no bubblegum or banana (which I was happy about). As the beer warms the fermentation character becomes more apparent. Overall this is assertive for it's strength and well on track to what I was going for.

Mouthfeel: High fine carbonation and a light crisp body. Perhaps the final gravity could come up a couple of points or I could try in some other way to increase the body a small amount (my FG was 1.005, which was a bit lower than my target). But as it is, it is pretty refreshing and I like that. There is a small amount of astringency/plantyness in the finish.

Overall Impression/Future changes:This is pretty nice overall. my main complaint would be the plantyness of it. That plantyness isn't too strong, but as it is something I don't want there at all, I'dd like to try to not get it in the next batch. For the next batch I think I'll try to drop the hop load a bit and maybe also drop the total IBUs. I may also shift a small amount of hops to earlier in the boil to serve as more of a classic bitterness addition. I approached this with more of a North American 'hop bursting' type brewing process and I am reasonably sure that this is not what is being done at the breweries making this sort of beer in Belgium. I'll also try to do a better job of keeping hops out of the carboy while transferring out of my boil kettle. I think in beers where I may be pushing limits when it comes to having a vegetative taste come through (especially when the rest of the beer is relatively delicate and fermentation temps might be elevated) keeping carry-over hops out of the primary becomes especially important.

The malt characteristics are good for this in that the malt is light and crisp and lets the hops really shine. I think maybe I'd like a bit more fermentation character, but not much. It is really easy with Belgian styles of beer to overdo it on the fermentation. Especially when bubblegum and banana esters start to develop (which I generally try to avoid/limit in Belgian beers). I'm happy with the fermentation character I got (and happy to miss many of the characters I didn't get) so I won't manipulate fermentation temperature too much. Also, as the beer ages more in the bottles I am noticing the fermentation profile come more forward in the balance.

A couple days after writing these notes I got the chance to have a nice commercial example of this style from the US - Russian River's Redemption. My quick comparative notes from that are that at first Redemption seems much lighter on the hops. And while that is true, Redemption is still appropriately hoppy (maybe not as hoppy as the Westmalle Extra or the Westvleteren Blonde), the refined nature of Redemption's hop profile makes it seem less hop forward. The other main difference is that Redemption has a stronger fermentation/yeast profile. I'd like my next batch to fall a bit in the middle of the two in regard to yeast profile intensity.

Thursday, July 17, 2014

Rye Spiced Saison Brewday

I have written before (here and here) about the very wide variability in saison. I generally prefer pale, hoppy, unspiced saisons, but I do like a nice dry spicier dark saison once in a while. Some of the commercial examples of dark saison are a bit too sweet or have a bit too much caramel for me, and I think this is the main pitfall of many darker saisons. It's difficult to balance the ester and alcohol profiles of the yeast (which provide the impression of sweetness) with malts to darken the beer (which, depending on malt choice and mashing, may leave a heavier sweetness). While you don't want to load on the crystal malts out of concern for sweetness (either perception or actual residual sugar), I think you can't rely too much on dry roasty/toasty dark malts (like biscuit, brown malt, chocolate, etc.) for your color either because with the high attenuation this could leave the beer too unpleasantly bitter/dry. A mix of the two with a smaller amount of caramel-type malt does add something nice to this sort of beer and I think it hits the right balance. It won't be as light and crisp but I think that's alright with amber to brown saisons, which for me make a great fall beer. There are some good examples out there (such as Upright's Late Harvest) with the right crispness and mix of esters and spices. In addition, the Mad Fermentationist has some excellent information on brewing darker saisons in posts about his annual tradition of brewing a darker saison, with a different recipe and different spicing/fruit each year.

The Mash
My goals with the first incarnation of this recipe (which was definitely inspired by the Mad Fermentationist) were to branch out a bit in my saison brewing from the pale hoppy saisons I typically brew (such as here, here and here) and to come up with a great autumn saison. This incarnation may have been brewed a bit early for fall, but that gives me time to tweak the recipe a bit more this year if I think it need changes. With this batch I'm keeping the beer 'clean' (no Brettanomyces or bacteria) but that is definitely something I want to incorporate after I work on the base recipe a bit.

Rather than going for a pilsner malt base and darkening with larger amounts of specialty grains I've decided to use a pale munich for the bulk of my base malt. I did this in my first try at this recipe and was happy with the results. In my second try I swapped it out for pils and a darker munich based mostly on availability of ingredients. Unfortunately I didn't get to taste any of the second batch as I brewed it with a friend whom I was teaching to brew right before I moved to Germany for 8 months, and he didn't save me any for when I got back. So this batch is back to the beginning and maybe I'll repeat it soon with the pils/dark munich combo if I'm not totally happy with this grist. There is a significant portion of flaked rye in this recipe which I think helps out the general more spice forward profile I'm going for and it probably also contributes a bit to the body. There is also a fair amount of acidulated malt. My goal with this much acidulated is to add a very small amount of tartness to the final beer (and I've seen this work well in previous batches) more than to adjust my mash pH. As I generally do when using this much acidulated, I limit the dose in my main mash to about 4 oz (113 g) and add the remaining with about 10-15 minutes left in my mash to avoid altering my mash pH for the bulk of conversion too much. I think that covers most of the intention and behind the recipe and any tricks in brewing. So here's the recipe.

Recipe:
Batch Size: 5.5 gallons
Target OG: 1.055
Target IBU: ~20 (Tinseth formula)
Target FG: 1.003
Target ABV: 6.8 %
Actual OG: 1.055
Anticipated color: ~16 SRM
Brew Day: 5-July-2014

Grist:
44.2 % Doehnel #27 (6-7 L Pale Munich). I've discussed this locally-produced malt in this previous post.
19.9 % Weyermann Pilsner
17.7 % Flaked Rye (I boiled these before adding them to my mash)
8.8 % Caramunich (Franco Belges I think, but maybe Weyermann)
6.6 % Weyermann Acidulated malt
1.7 % Special B
1.1 % Weyermann Carafa II Special

Hops:
63g Tettnang Pellets (4.3 % aa)
28g Styrian Golding pellets (5.3 % aa)

Yeast:
My 'house saison' blend of Wyeast 3724 and 3711 (about 63% 3724 and 37% 3711), approximately 215 billion cells total.

My spice and hop additions (clockwise from top right: Juniper berries, 0 min hops and green peppercorns, 20 minute hops and whirlfloc, all 30 rosemary leaves, yeast nutrient).
Spices:
6g Juniper berries (freshly crushed with a mortar and pestle)
3g Green peppercorns (freshly crushed with a mortar and pestle, do these first as the juniper berries are pretty resinous)
30 Rosemary leaves, fresh (less than 1g). This is a ridiculously small amount but I think it is appropriate. This amount was too small for me to weigh out so counting leaves it was. Rosemary is very potent and way too easy to overdo, so if you plan on using it be careful and err on the side of undershooting to avoid a one-dimensional spice-bomb. As I feel with pretty much all spiced beer, I would rather there be no spices than too many/too much and I generally shoot for near-threshold values so it isn't entirely clear what, if any, spices might be in the beer.
 

Other:
1/2 tab whirlfloc
1/2 tsp Wyeast nutrients
5 g CaSO4 and 5g CaCl2 added to the mash water (about 6.5 gallons, +85 ppm Ca2+, +113 ppm SO42- and +66 ppm Cl-). 4 g CaSO4 and 6g CaCl2 added to the sparge water (about 4.5 gallons, +153 ppm Ca2+, +168 ppm SO42- and +147 ppm Cl-. My sulfate to chloride ratio is closer to 1:1 than I would use in a paler saison, but I figured accentuating the malt in this sort of grist/beer makes sense. Victoria's water is basically distilled water so the amount added is quite close to the final total concentration.

Mash:
My game plan for the mash was 45 minutes at 146 (63.3 C) followed by recirculation with heat to 154 F (67.8) where I'll rest for 15 minutes. The recirculation step usually takes about 5-10 minutes and is accomplished by heating my mash kettle on my burner while running off into alternating kitchen pots. It isn't the most elegant system and I'm looking forward to setting up my newly-acquired pump soon. For mash out I don't really want to cut off my conversion completely so I'll just heat to about 158 F (70 C) while I vorlauf. As I mentioned in previous posts, I generally run my mashes pretty thin (> 2 qts/lb or > 4.2 l/kg) as I use a 10 gallon mash tun and my batches have on average something like 10-13 lbs of grain (4.5-5.4 kg) and the larger thermal mass helps me keep my mash temps better. As it stands I still generally have to recirculate my mash while heating it a couple times throughout an hour-long mash.

Boil:
The beginning of fermentation
I planned for a 90 minute boil but extended to about 110 minutes on account of having a larger pre-boil volume and lower gravity than my target. I added 28 g Tettnang pellets and 28 g Styrian Golding pellets at 20 minutes left in the boil and the remaining Tettnang (35g) with all of my spices at flame out. It took a couple more minutes to start up my immersion chiller so there was a very brief (3 minute) hot steep before I began cooling the wort.

Fermentation:
The fermentation plan was to pitch at 68 F (20 C) and raise to 78-80 F (25.6-26.7 C) over 4-5 days, and then hold at 78-80 F until terminal gravity. I control my fermentation temperatures with a water bath and an aquarium heater. Today (July 16th, 11 days after brewday) I'm at 1.004 so pretty much at my target. I'll probably let the beer drop to room temperature (about 70 F / 21.1 C right now as we have a bit of a warmer spell in Victoria) slowly by unplugging the heater off and leaving the beer in the water batch.

Here are tasting notes and ideas for changing the batch for next time.