Showing posts with label Mixed Fermentation/Sour beer. Show all posts

Tuesday, January 22, 2019

Spontaneous fermentation and biogenic amines

Biogenic amines (BAs) are a class of biologically-produced compounds that are found in plant and animal products such as cheeses, cured meats, and other fermented foods. The names of some specific BAs may be familiar, for example histamine, and others may illustrate the sorts of characteristics some BAs have (strong bad smells), for example putrescine and cadaverine. As the names of these latter two suggest, some BAs are associated with rotting material. In higher levels BAs can have health impacts, but I won't be discussing any of that. If you want more health-related information on this, check out this great complimentary post by Bryan at Sui Generis Brewing.

In beer, BAs can originate from raw ingredients and can also be microbially produced during fermentation. Especially in fermentations that are not pure cultures of S. cerevisiae, much of the BA content of beer can be formed during fermentation. This post will focus BAs in spontaneous beer by looking at data of BAs in lambic, with an emphasis on microbial BA production points, how this may impact the flavor and aroma of spontaneous beer, and how production can be minimized without inoculation (i.e. while maintaining a spontaneously-fermented beer). I won't go into much lambic background in this post, so if you're unfamiliar with the process and/or fermentation progression of lambic and other spontaneously fermented beers, then I recommend starting with this page on the Milk the Funk wiki and these pages (here and here) on lambic.info. You can also find all of my previous posts on lambic (history, hopping, IBUs, carbohydrates, commercial brewery/blendery visits, etc.) here.

A coolship being filled
As with my other posts on beer science, this might be a bit dense for those not so interested in science. Here is a simplified summary if the details are a bit too much and/or you're not interested in that part:

Biogenic amines seem to be produced in two different phases in spontaneously fermented beer - one from enterobacteria in the initial weeks and one from lactic acid bacteria after about 6 months. BA production in the first stage may be controlled/limited by pre-acidifying wort. Differences in BA production in the second stage may be due to differences in specific strains of lactic acid bacteria, as not all can produce BAs. There aren't enough data to be sure, but BAs produced in the first stage could impact the flavor/aroma of spontaneous beer.

Biogenic amines in lambic

The data sources
I will be primarily discussing two studies on BAs over the course of lambic fermentation - Gasarasi et al., 2003 and De Roos et al., 2018. The former followed the fermentation of un-acidified wort for 400 days, and also followed fermentation of wort which they pre-acidified with 5% of a very acidic beer. This beer was prepared from the previous brewing season by pitching wort with pure strains of lactic acid bacteria. It does not seem that this ~6 month old acidic beer was sterilized before using it in the next season at a level of 5% (contributing about 1g/L lactic acid). This second beer was followed for a total of 60 days. If this acid beer wasn't sterilized, that is unfortunate because it means the beer is no longer spontaneous. The authors also briefly mention tests with simple pre-acidifying with lactic acid, which they say resulted in a reduction of BAs, but unfortunately they do not show the data or discuss it further. The second study (De Roos et al., 2018) followed two different 660 L casks of lambic from the same brew from the time the casks were filled until they were two years old. The wort for these casks was pre-acidified to pH = 4.3. Finally I am including data from two different studies on finished lambic & geuze - Izquierdo-Pulido et al., 1996 and Loret et al., 2005.

Stage 1 - Initial days and weeks
Looking specifically at beers of spontaneous fermentation, there appear to be two periods where BAs are produced. The first point occurs early in the fermentation where enterobacteria are active, beginning in the initial day(s) after cooling and lasting for the first week(s) (e.g. Van Oevelen et al., 1977; Spitaels et al., 2014; De Roos et al., 2018). At this point in the fermentation, no significant attenuation has occurred so simple sugars are available and alcohol is absent. The pH is also higher at this early stage. During this stage the primary BAs produced are putrescine and cadaverine.

Variability is seen among available data for putrescine and cadaverine production at the start of fermentation. See, for example the differences in cadaverine and putrescine between the filled green circles (Gasarasi et al., 2003 data of lambic wort which was not pre-acidified) and the open green circles (Gasarasi et al., 2003, lambic wort which was pre-acidified). Additionally, the Gasarasi et al., 2003 un-acidified wort shows much higher putrescine than the De Roos et al. (2018) data. It should be noted that this comparison is between different batches of lambic from different years and from different producers, so there could be additional sources of variability. The difference for putrescine may be important, even if cadaverine levels are similar, as putrescine is more likely to have an impact on the taste and/or aroma of lambic at the observed concentration levels. This is discussed in more detail in the taste section below.

BAs in fermenting & packaged lambic. Data in black squares are from final products. An age was chosen
(~800 days) to include them in the figure and does not reflect their actual age (which is likely much older).
The ability of pre-acidification to limit BA levels in the initial production phase is because pre-acidification can limit and/or shorten the period in which enterobacteria are active in the wort. Both the Gasarasi et al. (2003) and De Roos et al. (2018) studies highlight the potential of wort pre-acidification to limit BA production in lambic. Gasarasi et al. (2003) note that pH > 5 and cooling to T < 15° C may result in elevated BA levels, and they say that adding 2000 mg/L lactic acid to wort reduces BAs but does not completely prevent BA production. A study on industrial lambic production where the wort was acidified to pH = 4 with lactic acid before fermentation also demonstrated that pre-acidification can eliminate the enterobacteria phase of fermentation (Spitaels et al., 2015).

A stainless steel coolship
Takeaways for brewers from the first phase
For brewers wishing to pre-acidify their spontaneous beers, these studies provide some possible starting points. Note that I haven't tried any of these myself, I'm just summarizing the advice of the papers. The specific levels mentioned here (2 g/L lactic acid in one study, pH = 4.3 in another, which took a bit more than 1 g/L lactic acid; the latter here being what one lambic producer does) may be a good starting point. Using a lower pH (pH = 4.0, as used by an industrial lambic producer) may further reduce BA production by preventing the enterobacteria step. 2 g/L lactic acid sounds like quite a bit to me, considering Van Oevelen et al. (1976) report ranges of about 2-3.5 g/L lactic acid in finished bottle fermented geuze. As a comparison, the lambic studied in De Roos et al. (2018) finished with 4-5 g/L lactic acid, and the bottled gueuze samples from Spitaels & et al., 2015 finished with about 4 g/L lactic acid or more. Depending on where the beer finishes, acidifying with 2 g/L could mean half or more of the lactic acid in the final beer is from the pre-acidification.

Finally, blending in old acidic beer around 5% (for very acidic beer) before fermentation could be a good starting point. Depending on how you feel about spontaneous fermentation, you may want to do a quick sterilization of this to prevent inoculation with microbes from the old beer. Or you may view this as beneficial for your beers, by encouraging fermentation with proven microbes, even if it may make the beer not spontaneous/less spontaneous. Finally, Gasarasi et al. (2003) note that pH > 5 and temperature < 15° C seem to favor BA production. Something else to think about when pre-acidifying is that not all metals remain inert as the pH drops (see here and here). I haven't seen data to assess what specific pH values are too low for less inert metals, but it is something you may want to look into further if you are considering this and are not using stainless to cool the wort. Or just pre-acidify after the coolship.

Another stainless steel coolship
Stage 2 - After main attenuation
A second phase of BA production can be seen in lambic. This is most evident in the tyramine and histamine data, where concentrations increase only around 100 days into fermentation. In the course of lambic fermentation, this corresponds to the acidification of the lambic by lactic acid bacteria after the main attenuation has been accomplished by Saccharomyces (e.g. Van Oevelen et al., 1977; Spitaels et al., 2014; De Roos et al., 2018). Lactic acid bacteria are known to have strain specific variability in the ability to produce BAs. Therefore, differences between producers at this stage may result from different strains of bacteria in different lambics. De Roos et al. (2018) note that there is still some uncertainty regarding this phase of BA production, as the timing of BA production in their data lagged behind the peak in Pediococcus cell concentrations during lambic acidification. This second phase does not seem to have much influence on cadaverine and putrescine levels, though the De Roos et al. (2018) data do show a slight increase in putrescine here.

Comparing with finished products
Comparing the production data and finished lambic data shows some distinct trends (see the table below). First, BAs in lambic appear to generally be higher than in other beers. Data over the course of fermentation suggest that any putrescine and cadaverine produced during the initial stages of fermentation are not appreciably removed as fermentation progresses. This means that once they are formed, they survive at more or less the same levels to the finished beer. A comparison of the histamine and tyramine data from De Roos et al. (2018) with compilation of finished products shows a similar concentration range, suggesting that the same may be true for these BAs as final blends are made and beers are packaged.

The data from Loret et al. (2005) are an average of 42 products from a total of 10 producers. These data demonstrate strong variability between producers in histamine and tyramine (also shown in their Figure 3, see also the range in values from Izquierdo-Pulido et al., 1996 below). This may be controlled by variability in specific strains of lactic acid bacteria. Comparing putrescine and cadaverine data from Izquierdo-Pulido et al. (1996), Loret et al. (2005) and the two production studies, there is also a large amount of variability here. Some of this may be explained by differences in ambient brewery resident microbes and other variability. However, the data from De Roos et al. (2018), Gasarasi et al., (2003), studies of biogenic amines in other alcohols, and data on pre-acidification of lambic and enterobacteria, it is likely that much of this can be explained by whether brewers pre-acidify the wort or not. These biogenic amines appear to be formed early in the fermentation and pre-acidifying could significantly limit their production. Finer details within the Izquierdo-Pulido et al. (1996) cadaverine and putrescine data imply an interesting feature. These data show a mean that is toward the lower end of the total observed range (cadaverine: mean = 10, range = 0.4-39.9; putrescine: mean = 6.4, range = 2.8-15.2). In order for this to happen, the data must be composed of more low values with only one or a few large values. This could reflect a few producers which do not pre-acidify and have larger values of these BAs while others do pre-acidify.

Data of BAs in lambic beer and other beers.
Can BAs impact taste in beer?
The table above shows BA levels in lambic and other beers as well as taste thresholds for some of these compounds in water. This does not directly give information on their impact in beer because water lacks the other strong tastes and smells found in beer, making the threshold for detection in beer likely higher than in water. These thresholds also do not take into account any additive and/or synergistic effects that BAs would have when found with other pungent BAs and/or other compounds in beer, potentially resulting in lower detection thresholds. But these values give a starting point for an initial assessment of the potential for BAs to be flavor-active at concentrations relevant to spontaneous beer.

I could not find data on tyramine thresholds so I won't discuss that here. The histamine data are a physiological response but not a taste or aroma. And this threshold value did not hold in triangle tests. So I think the data I've seen so far suggest that histamine does not have a strong impact on flavor/aroma at the levels found in lambic. Moving to cadaverine, it seems that the levels found in lambic are much lower than those needed to detect it. However, putrescine can be found around or above the detection threshold in water. If any BAs are going to be flavor-active, it seems that putrescine is the most likely one. And with levels in lambic potentially >2x the detection limit in water, I think it is quite possible that putrescine can make a contribution to the flavor and aroma of lambic.

Acknowledgements
While much of the data included in this post have been available for 10+ years, this is a topic that I haven't heard many people talking about. Especially not before the last few weeks. I want to thank a certainly legendary producer for bringing this to my attention a year or two ago, and for helping me to connect this scientific explanation with something I had perceived and was having trouble naming. This post was also prompted and informed by discussions with some great Milk the Funkers/brewers/writers: Dan of well-deserved Milk the Funk Wiki fame, Bryan of Sui Generis Brewing and Matt of A PhD in Beer and Patent Brewing Company.

22-Jan-19 Updates: the takeaways from the first phase section was updated about 3 hours after initially publishing the post to include context for pre-acidifying levels relative to final lactic acid in geuze and to include how much lactic acid was needed to pre-acidify to 4.3. The references were updated to incorporate new references as needed and to include links to papers at this time.

References
-De Roos et al., 2018. Wort substrate consumption and metabolite production during lambic beer fermentation and maturation explain the successive growth of specific bacterial and yeast species. Front. in Microbiol. 9:2763. (doi: 10.3389/fmicb.2018.02763).
-Izquierdo-Pulido et al., 1996. Biogenic amines in European beers. J. Agric. Food Chem. 44(10) 3159.3163. (doi: 10.1021/jf960155j).
-Gasarasi et al., 2003. Occurence of biogenic amines in beer: causes and proposals of remedies. Monatsschrift für Brauwissenschaft. 56(3) 58-63.
-Loret et al., 2005. Levels of biogenic amines as a measure of the quality of the beer fermentation process:Data from Belgian samples. Food Chem. 89(4) 519-525. (doi: 10.1016/j.foodchem.2004.03.010).
-Rohn et al., 2005. Can histamine be tasted in wine? Inflam. Res. 54(S1) S66-67. (doi: 10.1007/s00011-004-0439-x).
-Romero et al., 2003. The influence of the brewing process on the formation of biogenic amines in beer. Anal. Bioanal. Chem. 376(2). 162-167. (doi: 10.1007/s00216-003-1885-2).
-Spitaels et al., 2014. The microbial diversity of traditional spontaneously fermented lambic beer. PLoSONE 9(4) e95384 (doi: 10.1371/journal.pone.0095384).
-Spitaels et al., 2015.  The microbial diversity of an industrially produced lambic beer shares members of a traditionally produced one and reveals a core microbiota for lambic beer fermentation. Food Microbiol. 9 23-32. (doi: 10.1016/j.fm.2015.01.008).
-Spitaels & Van Kerrebroeck et al., 2015. Microbiota and metabolites of aged bottled gueuze beers converge to the same composition. Food Microbiol. 47 1-11 (doi: 10.1016/j.fm.2014.10.004).
-Van Oevelen et al., 1976. Synthesis of aroma components during the spontaneous fermentation of lambic and gueuze. J. Inst. Brew. 82 322-326. (doi: 10.1002/j.2050-0416.1975.tb06953.x).
- Van Oevelen et al., 1977. Microbiological aspects of spontaneous wort fermentation in the production of lambic and gueuze. J. Inst. Brew. 83(6) 356-360. (doi: 10.1002/j.2050-0416.1977.tb03825.x).
-Wang et al., 1975. Apparent odor thresholds of polyamines in water and 2% soybean flour dispersions. J. Food. Sci. 40 274-276. (doi: 10.1111/j.1365-2621.1975.tb02181.x).

Monday, January 8, 2018

Bière de Saison (1905) recipe - infusion mash

Compared to other beers (like lambic, grisette and Bière de Garde), I haven't said much about historic saison on this blog. So it's probably time I do a bit of that. Two fairly complete recipes are given for "bières de saison" in the Q&A sections of the 1905 Petit Journal du Brasseur. In both cases, the brewer describes their process in detail and asks for advice on this proposed process to make these beers. One of brewers wants to brew by infusion and the other by a form of turbid mashing. On the whole the recipes have similarities but I think it is worth presenting both in full as the two give a good idea how brewers were approaching these beers at the time - both in their similarities and their differences.

Question about a bière de saison in PJB 1905.
In this first post I'll address the infusion recipe as well as some background/context, with the turbid mash recipe and some comparison saved for the second post.

Background
Though the breweries aren't named, from the publication and the text it is clear that these are somewhat industrial brewers rather than the rustic farmhouse notion of saison (in the same way that modern saison breweries are generally not really farmhouse breweries but industrial breweries, some of which happen to be around farms). In that sense though, I think these recipes show an important point in the history of saison. They come at a time when the beers were still brewed in the winter and served in the summer and were still mixed-culture beers, but also when the beer had moved to commercial breweries as a component of their production instead of the lore of an off-season brew at a farm. So in that way they offer a point of connection between modern saison and the origins of saison, and they may fall close, in spirit at least, to the modern mixed-culture saisons.

I feel like I should also say something about the use of the term bière de garde here (although I've also discussed this in other posts recently). Both brewers call the beers they want to make a bière de saison and then clarify in parentheses a bière de garde. Bière de garde is used in a general sense here to mean a beer for aging, with bière de saison being a bit more of a specific name, but this shows the fluidity of both of these names for Belgian beer at the time. With that said, the recipe, process and advice given for these beers is quite similar in many ways to the sort of considerations taken when making Bières de Garde from the north of France.

These recipes both use "Escourgeon". I've talked about this elsewhere and it shows up in other places such as the saison history chapter of Farmhouse Ales. If you are unfamiliar with this grain, it is winter 6-row barley. In the 1800s and early 1900s Belgium was growing and using 6-row barley more or less exclusively. Escourgeon is frequently the recommended barley for beers for aging, though it may have been harsher than spring 6-row barley in younger beers. Within Escourgeon there was also a hierarchy, with certain regions preferred over others. In general, Escourgeon would have had a higher protein content than modern grains. With proper malting and mashing, this would mean more darkening (and the sort of flavor development that goes along with this) in kilning and boiling.

One final general point about these recipes - neither one of these recipes discusses the flavor profile of the finished beer or if the fermentation was "pure culture". But, given the time and the nature of beer (ale fermentation), they were likely mixed culture beers. What exactly that means would have varied from brewery to brewery, but it likely included some atypical Saccharomyces strains or non-Saccharomyces yeasts (so possibly Brett and/or other yeasts that you might find in other Belgian mixed culture beers) as well as the potential for bacteria. Both beers are reasonably hopped - around or above modern lambic levels (though this is not really a good comparison as one case deals with fresh hops from 100+ years ago that may not grown anymore and the other deals with aged modern hops).

Open-topped mash tuns, like this one at
Brasserie à Vapeur, can lose a lot of heat.
It is possible that in the time scale of around 5 months, some bières de saison may not have developed a lot of acidity. But I would guess that many would have, given acidity in other comparable beers like Bière de Garde, other discussions in PJB about acidic saisons and PJB discussions about customer taste preferences. So, for the modern brewer looking to brew something based off of this, using a mixed culture with multiple yeasts as well as lactic acid bacteria would be a good way to go.

Recipe
OG: 1.049-1.051
100% Escourgeon Malt
Hops from Poperinge - 3.1 kg per 100 kg grain, ~450 g/HL wort pre-boil. The varietal is not specified. Hopping is discussed below in more detail.

Process
Mash
  1. Mix water at 60-62° C (140-143.6° F) with the grain reach 52-55° C (125.6-131° F) in the mash tun. Mix for 20 minutes and then rest for 10-15 minutes.
  2. Infuse with water at 90° C to boiling to raise the temperature to 70-71° C (158-159.8° F). Rest 1.5 hours.
  3. Collect wort from the initial saccharification rest into the boil kettle.
  4. Infuse with water at 76-85° C (168.8-185° F) such that the mash temperature remains at 70-72° C (158-161.6° F). Mix for 20 minutes and then rest for 30 minutes.
  5. Collect wort from the second saccharification rest into the boil kettle.
  6. Sparge with water at around 75° C (167° F), or perhaps slightly warmer.
The old Brasserie Dupont mash tun.
There are some general things to keep in mind with this info regarding the temperatures of the added water and the resulting mash temperatures. A typical mash tun of the time would have been an open-topped iron mash tun with an aspect ratio sort of like a hockey puck or tuna can rather than something with closer to a 1:1 width to height ratio or more like a soup can (as is more typical of modern equipment). These ~1900 Belgian mash tuns could have lost a good deal of heat over the course of a mash rest (possibly around 2° C / 3.6° F per 30 minutes as mentioned in this post). Additionally, the infusion water is heating both the grain and the thick iron mash tun, and the latter would take a lot of heat to warm it up compared to modern equipment. Therefore, attempting to mash like this on a home scale or with modern commercial equipment might require some adjustments of the infusion water (smaller volumes or cooler water).

Hop fields in Poperinge.
Boil and hopping
The boil lasted 5 hours. The hopping was as follows:
  • First wort hopping:
    • 10% of the hops after the first mash runnings were collected
    • 10% of the hops when all of the wort has been collected but before the boil starts
  • Hops in the boil
    • 40% of the hops after boiling for one hour
    • 40% of the hops one hour before the boil ends (or 4 hours into the boil)
As noted above, the hops used in this recipe came from the Poperinge region, one of the two main regions of historic Belgian hop growing (and the main region for modern-day Belgian hop growing). The landrace Belgian varieties grown at this time (e.g. Coigneau, Buvrinnes / Tige Vert / Duitsche Hop / Tige Allemande, Groene Bel / Cloche Vert, Tige Blanche / Witte Ranke, Tige Rouge / Roode Rank) have more or less disappeared, though some varieties have been re-discovered and are seeing small-scale cultivation starting up.

Belgian hops were believed to be a bit less potent than contemporaneous German and Czech hops (for a bit more info comparing hops from different regions in the late 1800s and early 1900s, see the table in this blog post), and it is also likely that advances in hop farming could result in higher alpha acids in modern hops than historic hops. For the modern brewer, landrace French hops may be a good choice, or German or Czech hops at a slightly lower hopping rate than the one quoted here.

The final volume isn't noted in the Q&A so I'm not sure exactly what the final hopping rate would be in terms of g per HL. Based on the pre-boil volume given (45 HL) and the process (5 hour boil, maybe cooling in coolships or maybe not), and similar modern breweries (lambic brewing) I'm going to estimate that this is roughly 530 to 630 g per HL of wort in the fermenter, depending on if a coolship is used or the wort is force-cooled.

The old (and long out of use) coolship at Brasserie à Vapeur.
Fermentation and aging
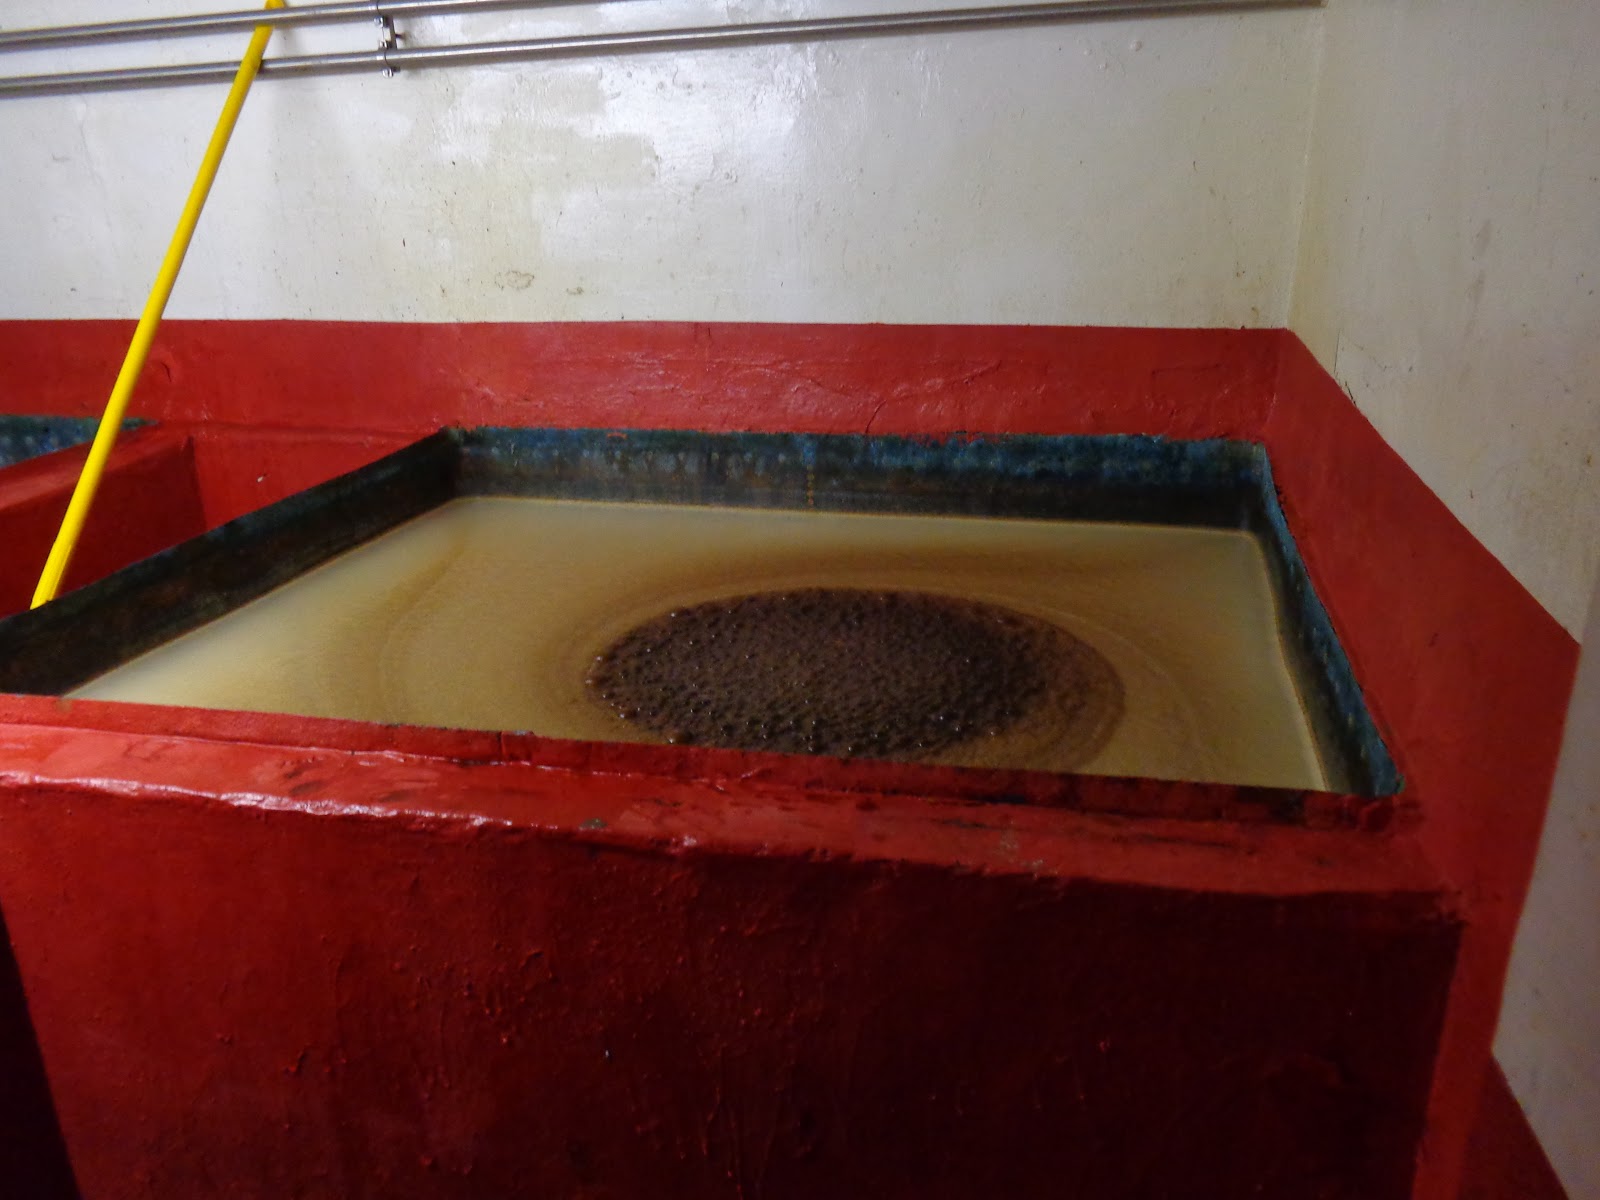
Yeast was pitched when the beer was 21° C / 70° F (nothing is said about the method of cooling, but coolships or a cooling system like a Baudelot chiller would have been appropriate). It sounds like fermentation at this specific brewery took place in a metal tank - perhaps something like what is shown below. But the beer was then aged for around 5 months, likely in wooden barrels.

Modern homebrew adaptation
Here is an approximation for adapting this to modern ingredients and at homebrew sizes. Feel free to make your own adaptations from the historic recipe. I haven't yet tried to brew something like this myself, so this is a theoretical recipe and could have some kinks to work out.

Batch size: 19 L (5 gal) pre-fermentation wort
OG: 1.050
ABV: ~6%
IBU (theoretical, Tinseth): 35
Total Efficiency: 75%

Open fermentation in a metal tank at De Dolle.
4.1 kg (9.0 lb) Continental European Pale malt. Go for something like Dingemans, Chateau, or Soufflet/Franco-Belges if you want a bit more color or something like Weyermann and Best is you want it to be a bit paler.

100 g Strisselspalt, 2% aa (other another low aa landrace hop, you may want to adjust the 4 hr boil addition a bit based on aa if you swap to another hop)

Mash: This follows the mash above, but you should probably rerun the infusion temperature and volume calculations as this could vary a bit based on your system. Keeping extra boiling water and extra cold water on hand in case you need to quickly adjust the mash temperature is probably good too. I think this is good in general, especially with new or complicated/strange mash schedules.
  1. Mix grain with 7.7 L of water at 60.6° C (8.1 qt at 141° F) to reach 53° C (127.4° F). 10 minutes total for adding the water and mixing. Rest for 20 minutes.
  2. Slowly infuse 8.1 L of water at 89° C (8.6 qt at 192.3° F) to reach a mash temperature of 70° C (158° F). Take 10-20 minutes for the rise, so maybe add the volume in small steps rather than all at once. Rest for 1.5 hours. This step could probably be shortened a bit with modern conditions.
  3. Drain the mash into the boil kettle. Keep this wort on low heat (intermittently if necessary) so that it stays between 75° C and boiling. I'm guessing the volume in the boil kettle should be around 12.4 L (3.25 gal) based on a grain absorption of around 4.2 L (~1.1 gal) and with a bit of extra wort remaining behind from false bottom dead space, etc. The remaining calculations are based on this figure.
  4. Infuse with 15.5 L at 71.7° C (16.4 qt at 161° F). The total time for the addition and mixing should be around 10 minutes. The rest for 30 minutes. This step could also probably be shortened with modern grain/equipment.
  5. Drain the wort and sparge (fly or batch, as you prefer) with water at 75° C (167° F).
Boil: 5 hour boil. For me that would mean starting with about 42.6 L (11.25 gal) assuming 3.8 L (1 gal) per hour boil off and 3.8 L (1 gal) loss to trub. Begin heating to a boil after the second mash wort is collected or, if fly sparging, shortly after you begin sparging.
  • First wort hop: 20 g, split evenly between hops added after the first wort is collected and once the wort from the second mash is collected.
  • 40 g hops after 1 hour of boiling.
  • 40 g of hops after 4 hours of boiling / with 1 hour left in the boil.
Either chill by using your boil kettle as a coolship or as you would normally chill your wort. If you go the coolship route this will likely change the extraction from the hops. If you have another kettle/vessel to use as a coolship then you could transfer off the hops into that when you begin cooling.

Fermentation: Pitch a mixed culture that you like including multiple yeasts and bacteria. I tend to keep around dregs of various commercial beers that I like along with a saison strain and some brett isolates/blends, so I'd probably use a combination of these (e.g. a saison strain or two that I like co-pitched with a brett isolate or brett blend that I like along with the dregs of commercial barrel aged saisons and/or lambics that I like all together for primary). Pitch the yeast around 20° C (68° F) and let free rise, or possible help it rise. The exact profile you follow will depend on which saison strains you choose.

Age for about 5-6 months, or until gravity is stable and you like the character. I see no reason to rack to a new vessel for the aging, so I'd just leave it in the primary fermenter if your primary is fairly air-tight (glass or stainless). Wood would also be fine if you have a good barrel, though I'd lean toward larger barrels if you go this route. I know small  barrels can work out well for some, but I've tasted a lot more disappointing beers from small barrels (too much oak/barrel character or too much O2) than good ones. Then bottle (or keg, if that's your preference - I'm partial to bottling), keeping in mind final gravity stability to avoid over-carbonation problems.

Part 2 of this, with a turbid-mashed saison recipe, is now up. You can find it here.

Monday, November 20, 2017

Brewing Bières de Garde (1850-1910)

Following up on this blog post giving background info on Bière de Garde and French brewing around 1900, this post gets into the brewing side of historic Bière de Garde. As noted in the background post, these beers are distinct from the modern northern French beers of the same name. As a brief comment on the modern side, I learned recently from Daniel Thiriez of Brasserie Thiriez that there is a new (well, ~1 year old) French law regarding what can be called a Bière de Garde - the beers now must be aged a minimum of 21 days after primary. We agreed that this law seems to be a bit toothless and quite broad, as there is no recipe restriction, etc. And 21 days is a far cry from the 6+ months of aging for Bière de Garde from around 1900.

Bière de Garde advertisement from the early 1900s.
From the collection of D. Thiriez.
The information for this post is a synthesis of 9 texts from 1850 to the early 1900s. These texts present a view from more established breweries, and spanning the time from the height of Bière de Garde to near when the original long-aged mixed culture versions disappeared. While each of the texts has small differences from the others, the general nature of the beer remains the same - a roughly amber colored beer of mixed fermentation with a moderate hopping and which is allowed to become acidic and vinous over 6+ months of aging.

Ingredients:
The grist composition of Bière de Garde was 100% malted barley which, for the time, was kilned using older methods. Direct heat was used and that the malt came out slightly toward amber. I think something along the lines of a continental European Pale Ale malt is about right given the descriptions of the final beer color and the process. The recommended barley was the Escourgeon, or winter 6-row barley. This was the common grain for much the area (across Belgium you often see the same recommendation) and it could be a bit of a sharp or coarse malt. Escourgeon had more polyphenols and higher nitrogen levels, which would help to develop more melanoidin compounds in kilning and boiling. This sort of malt wasn't great for softer or quicker turnaround beers, but it was well suited for aged beers.

Hops for Bière de Garde were primarily coming from the Nord region or Belgium. These hops were of more standard quality. This may present a bit of a challenge to the modern brewer, but French landrace hops may be a good place to start. Some sources also mention a portion of higher quality hops coming from Bavaria, Bohemia, or other regions of France, so this gives modern brewers some more options.

Yeast was pitched for Bière de Garde, and based on the descriptions of the final beers it was a mixed culture involving at least Brettanomyces and lactic acid bacteria in addition to Saccharomyces. Figuier, quoting Müller (1873), notes that Bière de Garde, and in general the beers of this region, had a vinous quality and that this quality was sought by locals.

General Specifications
Bière de Garde is described as an golden-amber or brown beer (sometimes both by the same source, suggesting that "brown" may have been used more generally or encompassed a wider range than it does now). Either way, from this I suspect the beers were generally not toward the darker side of brown, and a pale amber may be a better description for the modern brewer/beer drinker. The paler side of amber seems to fit better with the above photo. Though I'll note that the original of that print was from 1930, and therefore after Bière de Garde as discussed here had mostly (if not fully) vanished.

This table (below), modified slightly from a similar one posted a couple weeks ago on the blog's FB page, shows the parameters of ~1900 Bière de Garde alongside 1970s & modern lambic and geuze as well as modern Flanders acidic ales. Taking these 5 examples of Bière de Garde, the OG that one could expect around 1900 was roughly 1.045. This sounds a little low to me, so I wouldn't be surprised if gravities that were a bit higher (~1.050-1.055) were also brewed. But I haven't seen other gravities listed so far. With a very high attenuation, the alcohol of these examples generally comes out to around 6% ABV.

The acidity of the beers was fairly high, both in lactic and acetic acidity. On the whole the acid profiles compare well with Flanders acidic ales before they are blended back with younger beer for packaging, though BdG was a bit lower in lactic acid than these Flanders beers. And the acidity also compares well with more sharp lambics, but when averaging across multiple producers from the 1970s, ~1900 BdG is higher in both lactic and acetic acid.

A comparison of ~1900 Bière de Garde with some modern aged acidic beers.

Brewing Process
Mashing: Bière de Garde used a type of turbid mashing. Although only a few turbid mash schedules are known today, and only for a small range of beers, different schedules of turbid mashing were employed for a wide range of beers in Belgium and northern France. And there were many more versions of turbid mashing than remain in modern brewing (though even today there are still differences among lambic brewers about the specific rests, number of turbid pulls, and when the turbid wort is added back). The different Bière de Garde texts that I've seen all more or less describe the same sort of mash, with 3 temperature rests and one turbid pull:

-An initial infusion is conducted. Some texts have this rest temperature quite cool (25-35 C, some even lower than this) and others have it higher, in the protein conversion range.
-After the first rest, the wort is drained off and heated to a boil in a secondary boil kettle. This is the one turbid pull used in Bière de Garde mashing.
-Hot water (somewhere from 80 C to boiling) is added back to the grain bed to raise the temperature to the cooler end of the saccharification range. The mash rests here for a while.
-Wort is extracted and transferred to the primary boil kettle. Now the turbid wort which has been boiled comes back to the grain, and an additional saccharification step is now carried out with this wort.
-After the second saccharification this wort is combined with the earlier mash runnings in the primary boil kettle.
-The grain bed is sparged, more or less as normal, though much of this wort is used for table beers rather than Bière de Garde.

Here are a couple mash schemes from historic texts. First is a scheme based on the information in Bauby & Fournier (1868), taking into account the mashing that Bauby & Fournier report, the modifications they suggest, and filling in some gaps with reasoning and similar general schemes described by other sources. The second is a reproduction of the mashing scheme I presented in this blog post, which originally comes from Evans (1905). A couple of sources I looked at have the initial rest closer to 50 C rather than the cool starts of both of these mashes. But otherwise these other mashes follow a similar remaining process to these two. Finally, for reading the figures below, blue arrows represent transfer of liquid (removal of turbid wort, infusions, collecting final wort).

A mashing scheme based off of Bauby & Fournier (1868).
There are a couple general things to keep in mind with these mashing schemes. First, these mashes reflect non-modern conditions. Rest times could probably be shortened a bit if you wanted to try these yourself. Also, with the sort of equipment used in these breweries at this time, there was a much larger heat loss to the vessels than with modern equipment when raising the mash temperature. Additionally, it would not be uncommon to have an open topped mash tun, which would also lose a good deal of heat. Jean-Louis Dits of Brasserie à Vapeur has such a mash tun, and he reported temperature drops of up to 2 C per 30 minutes (see this post for more info about their mashing). So if you want to try one of these mashes yourself, you may want to lower the infusion temps to hit your targets and keep extra cold water around in case you overshoot. Finally, not everything is specified with these mashes to the extent that I would like (especially in the mash based on Bauby & Fournier). I have tried to fill in the gaps with what is reasonable given the mash process up to that point, expected heat loss, and what the wort would need to be like. And I have tried to present the remaining uncertainty to these assumptions.

The mashing scheme presented in Evans (1905).

Boiling: Bière de Garde underwent a long boiling. The sources agree on at least a 5 hour boil, with many mentioning boils lasting up to 8-10 hours. Considering this, the gravity is fairly moderate at around 1.040-1.050. The English brewers discussing the boil in Evans (1905) also note that they were surprised that the boil did not darken the beers as much as they expected.

Hopping rates were around 4-5 g/L (0.53-0.67 oz/gal), with some sources mentioning rates slightly above and below this. Some sources say that hops were added right at the start of the boil while others say hops were "only" boiled for a couple hours. So either way hops underwent a long boil of multiple hours. Some hops, especially if higher quality hops were used, may have been reserved for later in the boil. But overall this isn't discussed much in these texts

At the end of the boil the beers were cooled in coolships.

Fermentation: As noted above, Bière de Garde was pitched with a mixed culture, though at a lower rate than would have been common for most beers at the time. Fermentation began somewhere from around 20-25 C. Some later sources note the temperature may have started a bit cooler (~17-21 C). The beers were fermented in casks, generally the same casks as used for transport, and active fermentation took around 3 days. Following the primary fermentation, the beers were aged for around 6 months or more, during which time the beers developed acidity and vinous character.

Closing thoughts:
Having discussed BdG recipe and process, I think it is noteworthy that the descriptions of French Bière de Garde are quite similar to the descriptions of Saison in Belgian sources from around the same time. Suggested malts, mashing process, hops, boiling time, etc. are in general basically the same for these two beers. This is not surprising given that the Nord department borders the Hainaut province and that the beers share similar origin lore, but I think it is worth pointing out anyway.

Something to think of when
considering historic Bière de Garde?
Finally, I think it may be helpful to contextualize historic Bière de Garde by considering Cantillon's Iris. Perhaps this is a bit of a tired reference. When considering the above BdG-Saison comparison, I know I frequently say something to this effect and it is also in the De Baets chapter on Saison history in Farmhouse Ales. But I think the similarities are sufficient to bring it up again. Both are 100% malted barley (even more so - malt of about the right color) and also turbid mashed. The hopping rates are similar (though BdG was hopped a bit more and Iris is dry hopped). They both have a long boil and then are cooled in a coolship. Of course there are the important differences that Iris is spontaneously fermented while BdG was pitched with a mixed culture, Iris uses some aged hops, and Iris is aged longer. But still I think Iris probably falls closer to ~1900 BdG than many other modern beers would.

This wraps up a historic Bière de Garde brewday. Hopefully you found that informative, and it helped to differentiate the modern and historic (1850-1910) beers using this name. Here are links to other posts on the blog discussing Bière de Garde, both of which are also linked in the text above:

-Thoughts on Evans, 1905
-Introductory thoughts on BdG


Sources:
Lacambre (1851). Traité Complet de le Fabrication des Bières...
Bauby & Fournier (1868). Guide Raisonné de la Fabrication de la Bière.
Figuier (sometime in the 1870s, I'm not sure of the exact date). Les Merveilles de l'Industrtie...
Cartuyvels & Stammer (1879). Traité Complet Théorique et Pratique de le Fabrication de la Bière et du Malt
Boulin (1889). Manuel Pratique de la Fabrication de la Bière.
Moreau & Levy (1905). Traité Complet de le Fabrication des Bières...
Evans (1905). The Beers and Brewing Systems of Northern France.
Petit Journal du Brasseur (1910).
Mulo (I don't know the year). Brasseur ou Art de Faire Toutes Sortes de Bières.
Thanks also to Daniel Thiriez and Yvan De Baets for conversations that helped with organizing my thoughts about these beers.

Wednesday, October 25, 2017

Introductory thoughts on Bière de Garde

For the past couple years I have been somewhat passively researching Bière de Garde and I think the time has come for me to start being a bit more active about putting this info together into blog posts. Before getting into the brewing side I wanted to start with this an introductory/general post to address terminology and the setting for the beer. For clarity throughout this post, I'll use capitalized "Bière de Garde" to refer to the specific family of beers from the north of France and I'll use lower case "bière de garde" when using the term to more generally refer to aged beers. If this doesn't make sense, it should shortly.

The term Bière de Garde
A question regarding brewing a bière de garde from Ghent.
(Petit Journal du Brasseur, 1901).
Discussion of bière de garde from Augsburg and Munich, Lacambre (1851).
I find Bière de Garde to be one of the trickier families of beer to discuss based on the wide range of what this name can mean. To the non-Francophone beer world this term likely refers fairly unambiguously to a distinct (though still stylistically open) category of beers from the Nord and Pas de Calais departments of northern France. But the non-Francophone beer world might not be as familiar with this term to apply generally to a diverse category of aged beers, using the term for its literal meaning (beers for keeping/storage, or since this part has been done already by the brewer, beers that have been kept). The historic Belgian brewing literature regularly uses this term to discuss general beers designed to be aged. And these beers could cover quite a range of strengths, ingredients, and brewing styles. In the modern world I think bière de garde is used less generally, but when looking through the historic texts the French Bières de Garde are definitely in the minority of the uses of this term.

Just as the French-language brewing literature may use the term bière de garde to refer to beers unrelated to historic Bières de Garde, the modern beers bearing this name as a category are also fairly unrelated to the historic category. There is a discontinuity not only temporally between the historic mixed culture Bières de Garde that were found until the early 1900s and the modern range of beers bearing this name, but also in process and ingredients. For the rest of this post I'll generally be discussing historic Bières de Garde, focusing on the period between industrialization of breweries and when the historic versions disappeared in the early 1900s. For those interested in the rebirth of the name and the modern iterations, Farmhouse Ales (by Markowski) and The Beers of Northern France by Rigley and Woods give a good idea of the story and the range of producers. The former should already at least be on the list of any Anglophone brewer interested in Bière de Garde and saison, if not already read and re-read multiple times. While the latter is a bit dated, it can be found (at least now) for ~5 USD / EUR. It is certainly worth that if you're interested in French beer.

Recommended reading for modern Bière de Garde.
Brewing in France before the 1900s and brewers of Bière de Garde
While France may not have had always the beer focus of some of its neighbors, many distinct regional beers were brewed in the 1800s and earlier. Around 1850, Lacambre (Traite Complet de le Fabrication des Bières..., 1851) describes distinct regional ales from Paris, Strasbourg and Lyon in addition to the beers of Lille. I should note that Bière de Garde is generally discussed under the category of beers of Lille in the historic texts I've seen (Lille is the most prominent city of the Nord department). I am combining Nord and Pas-de-Calais for this discussion as modern Bière de Garde brewers can be found in both departments. But most of the historic documents I've seen mention Lille, and possibly the Nord in general, as the region for Bière de Garde without addressing Pas-de-Calais.

This diversity of regional beers seems to have changed quickly, as Figuier (Les Merveilles de l'Industrie, published in the 1870s) notes that Paris had switched rapidly to lager brewing starting in the late 1860s, modeling their beers after those from Bavaria and Vienna. During this time the brewers of Lille continued to produce their beers of top fermentation - these including Bière de Garde as well as an ordinary brown beer (which was served young) and table beers. In addition, some brewers produced a white beer (which I've written about here), though this was not very common.

A map showing the he Nord and Pas-de-Calais departments of
Northern France, western Belgium and some larger cities.
The resilience of the north, though strong, was unfortunately not enough to preserve these beers. Evans (1905) and Moreau and Levy (also 1905) both note that few regions of France were still producing top fermentation beers in 1905. And Evans notes that Bière de Garde was rapidly becoming less popular, having fallen from 50% of the consumption of Lille in 1900 to less than 20% in 1905.  With Bière de Garde already on the back foot, WWI was pretty much the end of the style. As I've written about a bit in this post, the devastation the region faced and the way this put additional pressure on breweries (loss of life, loss of equipment, insufficient crops to maintain production, etc.) resulted in a significant loss of breweries and the regional beer identity compared to before the war. This basically signals the end of traditional Bière de Garde production.

The table below shows brewing trends in the north of France in the early 1900s (the number of breweries and production volume, in degrees-hectoliters). This is presented for both the Nord department alone as well as the 5 northern departments of France that were more prominent beers regions (including Nord and Pas-de-Calais). While the date coverage is a bit spotty, there is a clear difference between the early 1900s (before WWI), where production and brewery numbers seem fairly stable and the 1930s. Other 1930s data as presented in Petit Journal du Brasseur 1939 are generally similar, though a decline in the number of breweries and some variability in total production are seen during the 1930s. 1939 was chosen for this comparison and it included both the number of breweries and the production volume for the same year.

Some quick data on the breweries and production levels in Northern France in the early 1900s.
The Bière de Garde revival, with distinctly different beers from the original Bières de Garde, begins roughly 10-50 years after this, depending on who you credit. Jenlain claims to have been the first among the new brewers to use the name Bière de Garde for their ale aged a couple weeks in tanks in the 1920s. Castelain employed the title in the 1970s for their lager CH'TI, also aged for weeks rather than months. It was not until around the 1970s and later that the name caught on to mean a new category of northern French beers.

General characteristics of historic Bière de Garde
A few points are clear about the general nature of historic Bières de Garde. They were turbid mashed, as is discussed in this blog post. Additionally the beers were top fermentation mixed culture beers. And, given that they were aged for many months, they had some chance to express this character. This is in strong contrast to modern versions, where the beers may be lagers or fairly neutral ales (as well as ales with a bit more fermentation character) which are generally aged a couple additional weeks.

This is sort of a strange contrast between the two Bières de Garde (along with some process differences that I'll get into in a future post), and makes them in effect two unrelated products. I think using the term bière de garde to refer to a beer with a bit more aging in the process is fine. And the modern use of the term does denote a specific category of beers (varied though that category may be, and although the aging is fairly short). But I think making a tie between the historic and modern beers of this name is tenuous at best. Perhaps it is better to brew the beer you like, call it something that makes sense and communicates what it is, and let the beer be just a beer without trying to invoke the historic lore of a beer brewed with fundamentally different ingredients and substantially different methods on different equipment.

Closing
Alright, so this gives a bit of an intro into Bière de Garde - where it came from, when it was produced and differences between the historic and modern versions. I'm working on synthesizing recipes and process to put together a post detailing brewing these beers. I've already let a bit of that info out in the form of this post on the blog's facebook page, showing the OG, FG and acid profiles of Bière de Garde from around 1900 as well as modern lambic and Flanders acidic ale. Hopefully I'll have a brewing process/recipe-focused post within the next couple weeks.

Monday, August 28, 2017

Spontaneous fermentation barrel fill

This post details the first spontaneous beer I have fermenting in oak. It is in a 225 L / 60 gallon barrel that I co-own with some friends, and so far it is progressing nicely. We filled this barrel with one big brew day - a turbid mashed brew taking inspiration from lambic production - using a bunch of our homebrew equipment pooled together.

I'll focus mostly on our decision taking for this approach to the barrel rather than a solera-type approach and cleaning the barrel, but I'll also include more typical brewday stuff (our plan, recipe, process, etc).

The barrel needing a bit of touching up, accomplished here
with a heat gun, beeswax and something like a putty knife.
The barrel
I've mentioned the origins of this barrel in this blog post. Since November 2014 this barrel has been full of a homebrew solera-type project. The initial fill was a saison with brett and Lactobacillus. After about 7 months we pulled off ~1/3 and re-filled with young (<1 month old) beer that was turbid mashed, open cooled and then pitched with various cultures (dregs, ambient wild microbes and lab cultures). A second partial empty and refill was done 14 months later, again with lambic-inspired young beer (and one portion was spontaneous this time).

Since the initial fill, we felt that the beer wasn't really progressing the way we wanted. The end goal was something lambic-inspired and the group that shares the barrel has had a growing interest in spontaneous fermentation. But the partial re-fills with young beer weren't really pushing us in that direction as much as we liked. The beers coming out had increasing acidity, approaching levels beyond our goals for a balanced product, and the flavor complexity wasn't really developing as we wanted. Maybe this is influenced by the pretty strong presence of saison still in the barrel. Also, with the pitched cultures already present in the barrel we felt that we may have been preferentially feeding a subset of the organisms active over the course of spontaneous fermentation rather than getting the expression of a more thorough set of microbes over the course of fermentation.

The barrel waiting to be filled the morning after the brew day.
To be clear the beer coming from the barrel was fine. It was pleasant to drink and I've used it in blends (here for example). But the beer was lacking complexity, and we were looking for something more from the investment of time and the potential that we knew the barrel had. Our slightly underwhelming experience is not to say that a solera system inherently won't produce the beer we were looking for. Though I do think perhaps it is better suited for certain styles, at least as it is practiced by homebrewers. And maybe our goals weren't aligned with the strengths of a solera-type system. The typical homebrew solera is a bit different from the traditional solera system (for example as used in sherry), where a multiple barrel system is employed. With this system, refilling is accomplished using the next oldest product when the oldest product is partially removed. This continues up the line such that progressively younger but already aged product does the refilling for most of the levels. On the homebrew side when it can frequently be wort or rather young beer and a one-vessel system, the refilling may not done with an aged product. That's certainly the way we did it at least. And our experience may have been better if we refilled with 6+ month old beer rather than <1 month old beer or wort.

About 25-50% of the pooled gear...
Anyway, this specific barrel wasn't on our ideal track, so we were looking to completely empty, clean, and re-fill either way. With that in mind, along with the selective feeding idea and the end goal of spontaneous fermentation, we decided to step away from the homebrew solera approach and opted for a complete fill from one brew day, open cooled at one spot overnight, and racked in to the barrel without pitching any cultures.

Planning the brew day
Completely filling a 225 L wine barrel on homebrew gear is not an easy task. We've done this before doing 3 brews in series. But that was with more simple infusion mashes and a shorter boil. With the long boils and intensive mashing process we were going for this time, we decided on brewing in parallel. If getting together with 3 of your friends to brew about 250-300 L of wort in order to have at least 225 L after overnight cooling sounds like a good idea to you, then I guess there's a few of us out there. If it sounds like a terrible idea, there's probably a good deal more in your camp. In all honesty it is probably a bit of both.

This much grain means a lot of stirring of thick mashes...
We started the planning with a list of the equipment we had available to make sure we had the physical capacity to hold and heat that much liquid. We were bringing together 4 brew systems using different methods of heating and mashing (electric BIAB, electric w/ false bottom, stovetop BIAB and propane w/ false bottom), which required some shuffling to make it all work out. But with this and with the additional miscellaneous gear we had, the brewday could go forward.

We split that gear into roughly 3 brews. Or at least 3 mashes, as some brews may require multiple boils. We designed these brews so they could be treated as more or less independent, but flexibility with this was key on brew day. In general things went as well as they did because we had enough people to problem solve and/or make runs for additional supplies as needed during the brew.

2 of the 3 propane boil kettles
By the end of April 2017, after weeks of planning and sending drafts with all of our equipment capacity and shifting vessels around to try to produce enough wort, we had everything sorted for the brew day:

-We planned for 3 mashes at the same time with one large electric kettle to heat the necessary strike and infusion water and one kettle for the combined turbid wort.
-The boil would be split into ~5 kettles, as needed. As the volume dropped during the boil, and as we cleaned larger pots from the mash, we could combine into 4 total.
-Our cooling plan was to use the bottom half of a Blichmann  conical fermenter and two of the boil kettles.

This gave us an estimated cooling capacity of around 285 L / 75 gal (we had to guess at the volume of the conical), which should be sufficient with evaporative and trub/hop losses to get near to the target of filling the barrel.

The two electric boils and the extra extractor fan.

The brew day
We used about 60% locally grown and malted barley and 40% soft white wheat. Our turbid mash had 4 rest steps (dough in, protein, cool saccharification and warm saccharification) plus a mash out and 2 turbid pulls. We generally followed the Cantillon turbid mashing process (see MTF and lambic.info for more specifics here, see also Wild Brews by Jeff Sparrow and this Funk Factory writeup). The snags on the mash side were trying to evenly split sparge water across mashes of different sizes and different types of mashes (which inherently drain at different rates). This was compounded by stuck sparges on the largest of the mashes due to the high load of difficult grains.

While a benefit of turbid mashing is that it allows for overloading mash tuns, both in terms of fill level and in terms of proper conversion for good runoff, traditional Belgian mash tuns for this are more tuna can-shaped than our soup can-shaped tuns. So for the same volume our grain bed ends up comparatively deeper. This also made mixing difficult, as shown above, which could have resulted in worse conversion of the mash and could have contributed to the stuck sparge. Anyway, that was sorted out well enough, but it took a bit more time and made the splitting of sparge water (i.e. tying not to over-sparge some mashes and under-sparge others) trickier.

Cooling vessels 2 & 3.

Cooling vessel #1

We planned for a 3 hour boil and were fine with topping up the boil with water as needed. We wanted to fill the barrel completely so we were happy to take a small loss in OG if it meant a full barrel. We were hopping at a rate of around 3.8 g/l (based on the target end of boil volume) with aged pellets from hops direct and homegrown aged whole hops. We added these at the start of the boil. With the two electric systems going inside we needed to bring in an industrial extraction fan (in addition to the normal kitchen hood already active) to properly remove the moisture.

We left these beers to cool overnight. The nighttime low for the area on that night was just under 8 C (about 46F). Wort from the two electric boil kettles was transferred to the lower part of the conical fermenter, and therefore this wort was removed from the hops. The other two pots of wort were topped up with remaining electric wort and left to cool on their own, so these still had at least most of their hops in contact. The wort remained to cool for a total of about 16 hours before being transferred into the barrel and the wort temperatures on the morning after cooling were 12 and 14.5 C (53.5 and 58 F) in the two boil kettles. So the temperatures, both ambient and wort, worked out great.


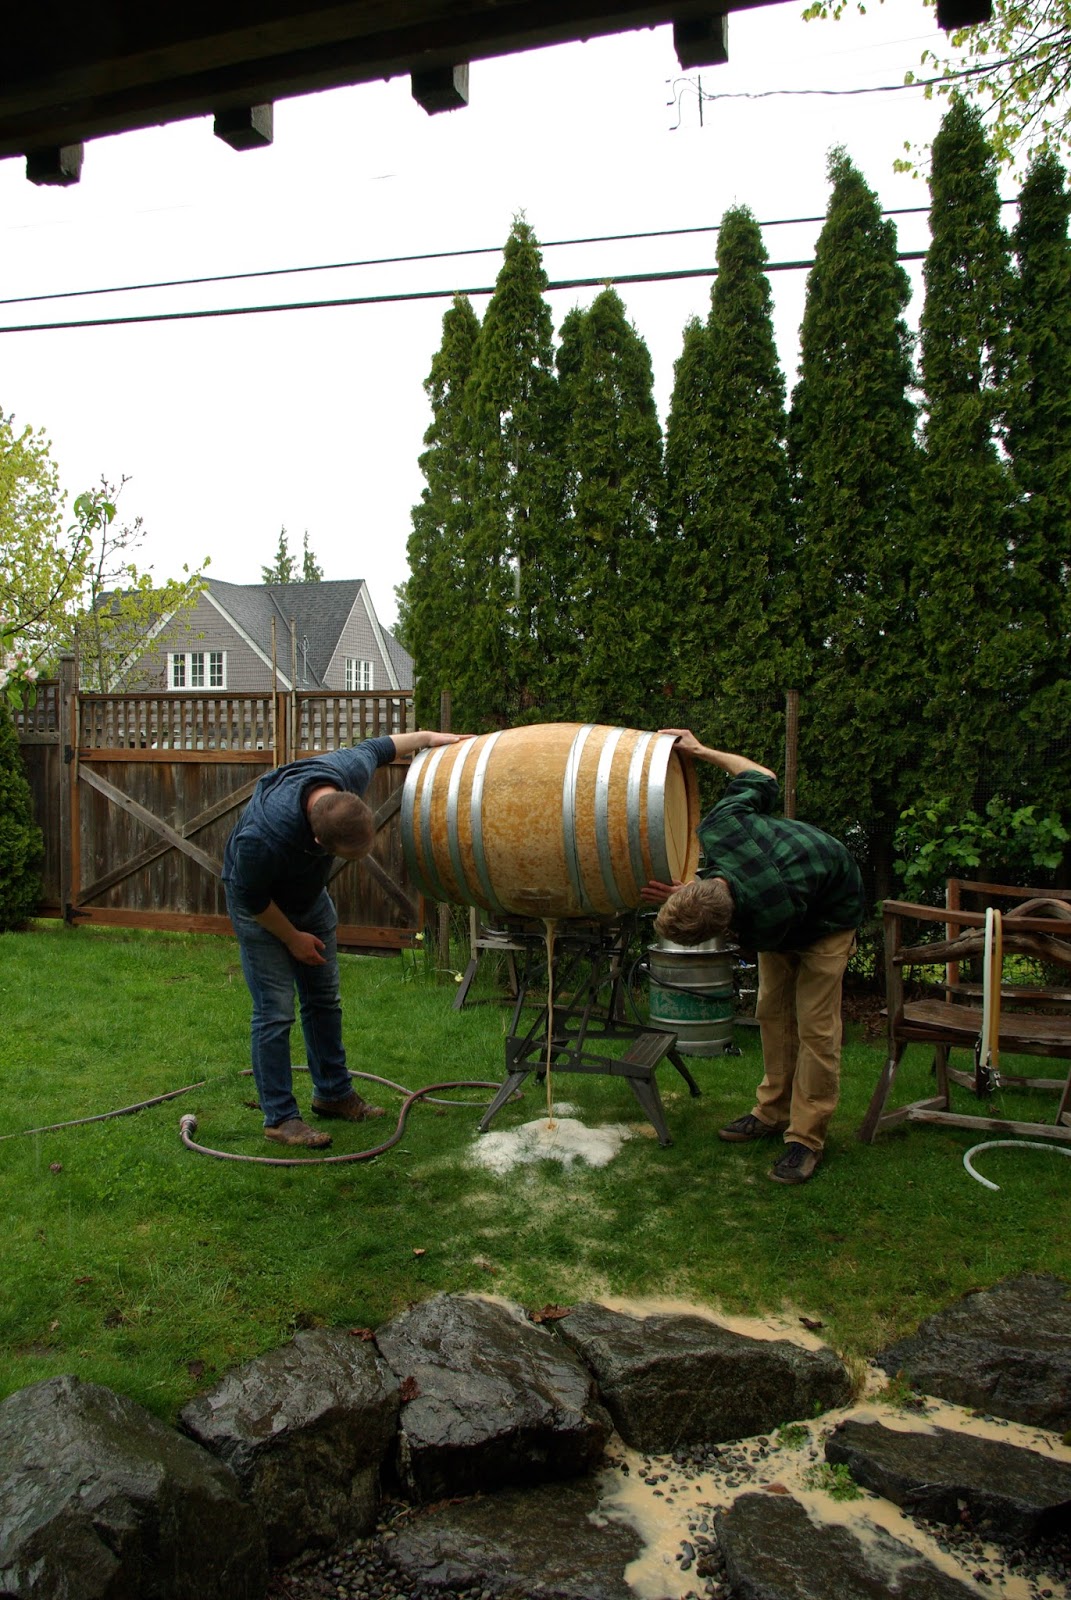
Emptying the barrel.

Barrel cleaning
We had decided to empty the barrel on the same day as the brew day. We figured there would be enough down time during the ~3 hour boil to allow for this, and we didn't want to store the barrel dry or use any sort of storage solution if it could be avoided (as both of those would require extra work rinsing and/or swelling before we could use it). This did add the challenge of needing enough empty carboys to hold a full barrel, and transporting those as well as all the gear, but at least we didn't need any carboys for the wort going in.

We did this racking with a pressurized racking cane built with help from the engineer of the group. The basics of the cane follows this post on A Beer Diary, but with a cross instead of a plus to allow for a pressure relief valve (and this is a 1/2" cane rather than 3/8"). See also this FB thread on MTF. I'm behind on making use of the beer that came out, but that's another story.

With the boil done (clearing up some outside space) and the barrel empty, we could turn out attention to cleaning the barrel. We wanted to do a fairly thorough clean for a fresh start. Our strategy was primarily 2 parts - a prolonged spraying followed by steaming.

The barrel was sprayed out for a long time
We started the spraying with hot water at a laundry sink but we quickly realized our spraying goals were going to be better served by moving outside for the cleaning. The barrel was sprayed out with cool water until the water ran clear and tasted pretty neutral. This spraying also included some vigorous sloshing and rolling for good measure. This took a long time. I don't have notes on exactly how long, but all together it was 30 minutes+ of spraying, sloshing, dumping and re-spraying. Then the barrel was visually inspected and trouble areas were targeted until it all looked good. I spent much of this time becoming increasingly less dry...

Our spraying out also included wanting to spray the inside top of the barrel, but we weren't able to easily reach that. We were able to get around this by bending a standard racking cane (after first softening it with a heat gun) to about a 30° angle, or perhaps a bit smaller, and cutting the extra length of the cane off. This allowed the end to fit into the barrel and direct the spray back toward the top.

Now we had a visually clean barrel, but we had been using cold water which wouldn't do much to knock back the microbes that we didn't physically remove. For this we had a steaming plan. Steaming on a home scale can be a bit trickier. After trying to come up with some good way to do this, the engineer of the group came to the rescue with a converted pressure cooker. I think it is important to note here that you need to be very careful whenever you are working with steam and pressure. Be sure to have proper safety precautions in place and our method may not work for other setups/barrels. And there is definitely room for improvement.

We used a converted stovetop pressure cooker with the primary weight-based pressure relief valve removed to have a hose attached to this opening. This hose was then put into a bung in the barrel, transferring the steam from the pressure cooker to the barrel. We still had multiple levels of pressure relief. First off, the secondary pin to release pressure on the cooker was in and therefore there was pressure relief on the cooker side. Secondly, we had multiple press-fit connections leading to the barrel to serve as release points in case we built up too much pressure. These were the connections from the tube into the bung as well as the bung in the barrel, which was not forced down as tight as one might do when aging in the barrel. We knew from experience with the racking cane that the bung could pop out under a low pressure when it is not strongly forced into the barrel.

Steaming the barrel.
We started the steaming of the barrel with our "Vinnie nail" out, allowing venting of the steam out of this opening. With this, while steam entered the barrel, the barrel was not warming up as much as we would have liked. So we replaced the nail after about 5-10 minutes and continued steaming in a closed system with the aforementioned engineered weak points (or if German-inclined, sollbruchstelle - one of my favorite German words). I didn't keep good track of steaming time, but it was clear the steaming was doing its job. First the heads of the barrel became warm to the touch. The exterior of the barrel was wet from rinsing before the steaming, and we could see this moisture evaporating away. Then the sides of the barrel also became warm to the touch. Eventually our engineered weak points did their job, venting the pressure, and we decided to end the steaming there. We felt a sufficient enough job had been done as it was probably at least 20-30 min of total steaming (with and without the nail in place) and all exterior surfaces of the barrel were quite warm.

With a bit more planning time we'll hopefully have a better setup next time. I think it wouldn't be too tricky to work in a pressure relief valve like. Basically the same design as the racking cane should work (and only a T fitting would be necessary, rather than the cross on the cane). Though again, from out experience, the bung on that cane pops out before the pressure relief valve is active anyway. But more pressure relief options are probably not a bad thing. Another option would have been to try longer with the sampling nail out. Perhaps with more time to build up heat this would have worked well.

Filling
We returned the morning after our brew day to fill the barrel. The pots that could be lifted easily were carried over to the barrel for filling. The others were transferred into intermediate smaller pots and then carried over. Filling the barrel went fairly smoothly, but it was clear fairly after working through the conical that we had undershot our volume. We had a bit more than expecting in our evaporative loss. And a calculation error meant that we were high in gravity but low in volume. This was an easy problem to solve and we diluted in the barrel with extra water (which had been heated to above pasteurization temps from the day before). In the end, based on a gravity points and volume calculation, we had an OG of around 1.055.

Other than this volume challenge, and some slow flow on one of the kettles due to clogging a hop filter, the filling of the barrel went pretty smoothly. We ended up leaving a small amount of head space in the barrel. It probably only amounted to about 10-15 L, but we figured this might help keep the avoid absurd blowoff while still keeping the barrel almost completely full. And we filled a carboy with the extra wort for fully topping up the barrel after primary.

Fresh greens and cleaning, an important part
of every brewday. photo: J Young.
Interestingly, there was a clear difference in the fermentation progression of the barrel and the carboy. This fits with data on the inoculation of lambic from Spitaels et al. (2014), which reported microbes present inside of cleaned barrels that weren't detected elsewhere in the brewery. It is certainly possible to clean a barrel more thoroughly than we did, but I think we did a pretty reasonable job with the physical removal and then given how warm the outside of the barrel was after steaming.

For me, this difference in fermentation from the two vessels helped to confirm previous anecdotal experience form myself and other as well as available published data that fermentation vessels can impact inoculation in spontaneous beer. I am not very convinced that a barrel can be made sterile / as clean as a carboy and I think this can be important. Anyway, after a few months (from reports from the other folks involved in this brew) the carboy was a bit unpleasantly bitter while the barrel did not have this bitterness. The carboy was transferred into the barrel after we felt that the risk for blowoff was gone. The barrel also developed a bit of a "sickness" after active primary fermentation while the carboy did not.

I'm excited to see how this beer develops over the coming year(s). Hopefully I'm back around to deal with it when we remove it. And hopefully I can be involved in the next ill-advised filling session. Our plan for now is to let the beer go in the barrel for a couple years, while monitoring it's progress here and there. We're certainly not in a rush to empty it and re-fill it.